• Skip to primary navigation
  • Skip to main content
  • Skip to primary sidebar
  • Skip to footer
Home Garden Joy
  • Home
  • How to Garden
    • Seed Starting
    • Plant Profiles
    • Tools & Equipment
    • Raised Bed Gardening
  • Vegetables
  • Fruit
  • Herbs
  • About
    • Books & Classes
      • Herbalism Classes
      • Books for Christian Herbalists
      • Privacy Policy

Replacing a Raised Garden Bed

March 27, 2017 by Jeanne

This weekend, our project was replacing a raised garden bed. We build the original raised beds about nine years ago. Sun, water, and weathering rotted the boards. They were coming apart at the corners. It was time to replace the raised garden beds.

replacing a raised bed

Replacing a Raised Garden Bed

We built our raised bed vegetable garden nine years ago. Many of the boards have since started to rot and are pulling apart at the corners. We used metal braces drilled and screwed into the corner as a temporary measure, but the rotting wood was crumbling. It was time to replace the raised garden beds.

To replace your raised garden beds, you can use a similar method.

Steps to Replace a Raised Bed Vegetable Garden

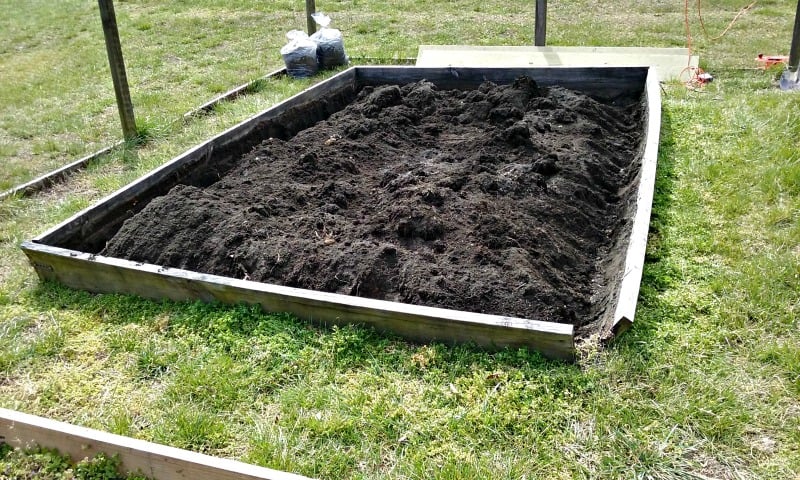
The bed we are replacing is 8 feet by 8 feet square and is currently used for potatoes and sweet potatoes.

  1. Buy the wood you need for the sides of the bed. We use pressure-treated lumber. Not everyone agrees that this is safe in the garden but I believe the research shows that plants placed away from the edges do not absorb any chemicals leached into the soil. You should make your own decision.
  2. We cut the boards to the proper length. We purchased 12-foot boards and cut them to 8 feet. The extra 4 foot sections will be used to replace other beds in the garden. Our garden contains two 8 x 8 foot beds and 10 beds of 4 x 8 feet.
  3. Once the boards are cut, carry them to the garden area.
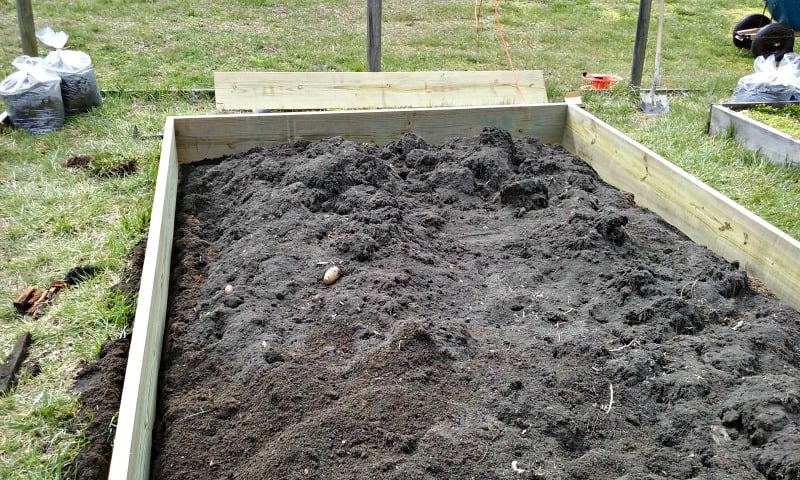
  4. Using a garden shovel, shovel the existing soil into the center of the garden and away from the edges.
  5. Begin dismantling the sides of the existing raised bed by unscrewing the bolts or screws holding the wood together.
  6. Wearing gloves to prevent splinters, pull up the old boards once the screws are out. The boards may split. Pile the pieces up and discard properly in the trash.
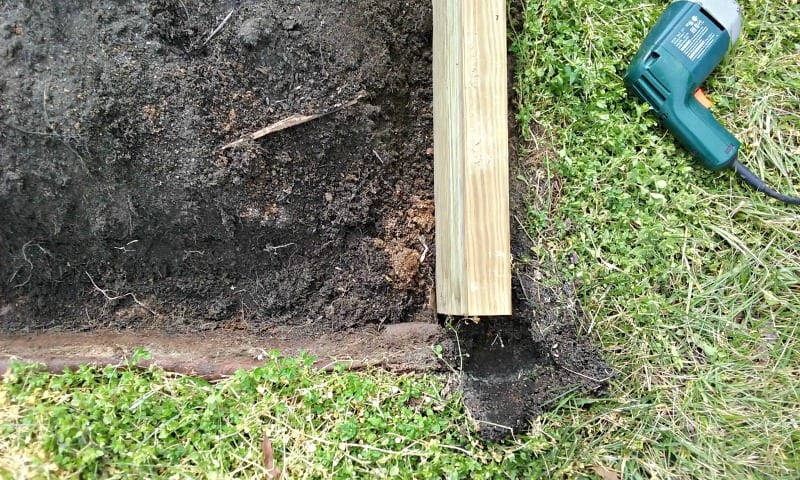
  7. Using a hand trowel and hoe, dig a replacement trench on the edge of your garden where the boards will go.
  8. Start the screws into one of the boards.
  9. With a helper, move two boards into place. to form a corner angle.
  10. Hold at the corner so that the corner aligns.
  11. Place the screws that you have already started.
  12. Repeat on each corner. It may be difficult to align the corners perfectly. The closer you align them each time you screw them together, the better.
  13. Check that the boards are in the trenches you have dug with the hoe in the existing trenches.
  14. Push the soil back and use a rake to smooth it out.
raised
You can see on the old raised bed how the wood had splintered and split. The corner was completely open from the wood warping and pulling away.
Here you can see three of the four corners attached. The soil is pushed into the center. And yes, that’s a potato we found – when you grow potatoes, you always miss on during harvest!
raised bed

And there you have it – replacing a raised garden bed. It takes us about 3 hours now from start to finish to tackle the job on a big bed like this. We had to weed it first, push and dig the soil back, remove the old boards, re-dig the trench, and replace the soil. Hopefully, we won’t have to tackle this task again for another 9 or 10 years!

Updated on May 7, 2021 with new links and improved content.

Filed Under: Raised Bed Gardening

Previous Post: « Are Tulips Annuals or Perennials?
Next Post: How to Grow Vegetables in Containers »

Primary Sidebar

Let’s Connect!

  • Facebook
  • Instagram

As Seen in Porch

 As Seen in Porch

We were featured in Porch.com and answered reader's questions about indoor plants.

Explore All Gardening Articles

Latest Articles

  • Volunteer Plants – Nature’s Unexpected Gifts
  • Free eBook on Herbal Safety
  • Watermelon in the Home Garden

Herbalism Classes & Supplies

Goods Shop by Herbal Academy – botanically inspired products

Disclosure

Home Garden Joy participates in two affiliate programs: Amazon and The Herbal Academy. Home Garden Joy earns a commission from qualifying purchases as an Amazon Associate. As an Herbal Academy Associate, HGJ also earns a commission when you sign up for classes or purchase herbs or supplies from The Herbal Academy. Herbal information and recipes on this site are provided for educational purposes only.

Footer

a closeup of watermelon

Watermelon in the Home Garden

Growing watermelon in the home garden is not for the faint of heart. I have plenty of room, and it still threatened to take over the garden. You will either need to leave a lot of room for the sprawling vines or look for varieties specifically marked for containers. Growing it on a trellis is…

Read More

a zucchini growing in a raised bed

Growing Zucchini in Raised Beds

Growing zucchini in raised beds ensures that this prolific vegetable has the best conditions to thrive. You can grow zucchini in pots or containers, but I prefer growing it in raised beds. This is a great vegetable to grow if you have a “black thumb” and kill plastic plants, because it’s hard to grow a…

Read More

a close up of onions

How to Grow Onions in Your Backyard

Wondering how to grow onions? I’ve grown onions here at Seven Oaks Farm in several ways: from “sets” or starter plants and from store-bought onions that sprouted in the bag! Onions don’t require much space, and you can grow a lot for the money you spend on starter plants. Let’s take a look at how…

Read More

butternut squash growing in a raised garden bed

How to Grow Butternut Squash Organically

Learning how to grow butternut squash organically ensures you know how to grow this tasty, nutritious vegetable in your home garden. I’ll share with you some basic information on growing butternut squash, followed by some organic gardening tips that have been helpful for me here at Seven Oaks Farm in dealing with the various pests…

Read More

  • Privacy Policy
  • About
  • Awards

Copyright © 2025 Home Garden Joy on the Foodie Pro Theme