• Skip to primary navigation
  • Skip to main content
  • Skip to primary sidebar
  • Skip to footer
Home Garden Joy
  • Home
  • Blog
  • Start Here
    • Seed Starting
    • Composting Basics
    • Vegetable Gardening
    • Growing Fruit
    • Growing Herbs
  • Recipes
    • Canning and Food Preservation
    • Vegetarian Meals
    • Salad Recipes
    • Soup Recipes
    • Dinner Recipes
    • Dessert Recipes
  • Books & Classes
    • Classes
    • Books
    • Books for Christian Herbalists
  • About
    • Advertise
    • Awards and Accolades
    • Privacy Policy

Steps to Build a Raised Vegetable Garden Bed

March 10, 2014 by Jeanne

The steps to building a raised bed for your vegetable garden aren’t difficult. You can build a raised bed with simple tools and wood in one afternoon.
steps to build a raised bed garden
.
.
Spring is finally in the air here at Seven Oaks. This weekend, temperatures soared into the 60s. On Saturday, I felt the urge to do some spring cleaning. I cleaned out the pantry shelves, scrubbed away the grime and threw away half-open bags of mystery food. Possum Pete got a handful of stale marshmallows. Hubby sprinkled them on the compost pile for the critter.  The next day, they were all gone. Whether “Pete” (or “Petunia”) actually claimed them or another critter, we’ll never know, but it’s nice to know they weren’t wasted. I cleaned the kitchen, scrubbed floors, and organize the shelves. It felt like spring was just around the corner – finally!

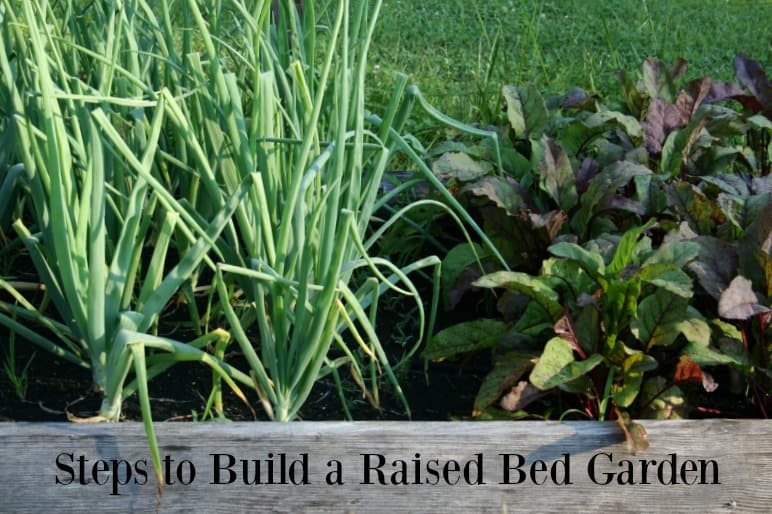
Steps to Build a Raised Bed Garden

In the afternoon on both Saturday and Sunday, I helped Hubby rebuild and replace the raised bed in the vegetable garden that collapsed over the winter.  You may recall from my previous posts on raised bed vegetable gardening that our garden contains three beds built from untreated lumber, and the remaining beds built from pressure-treated lumber. The untreated lumber lasts approximately five to six years. The bed below is five years old and you can see that rot has set in as well as insect damage. The corners tend to go first, as well as the eastern ends for some reason.


raised vegetable garden bed
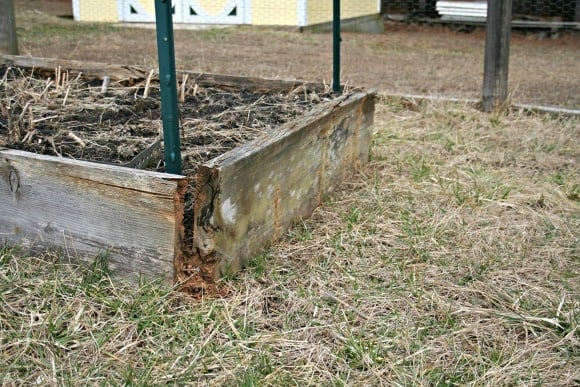
Untreated wooden garden bed after five or six years.  This needs to be replaced.

.
.
We replaced one of the untreated raised beds last summer when our nephew was here visiting. He loves to build things, and he loves my hubby, so the two pals buckled on their tool belts and went to work, with a little help from my brother in law and me. Over the winter, the third raised bed collapsed, so we took time this weekend to rebuilt it. 
.
.
Below you can see the bed we built last summer (slightly lighter colored wood) and the new bed built this weekend:
 

vegetable garden bed construction
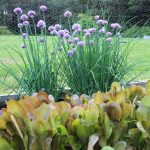
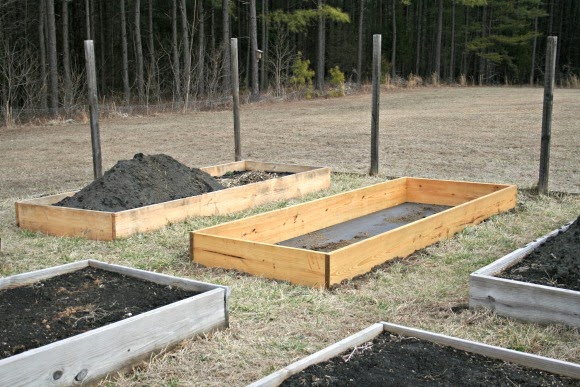
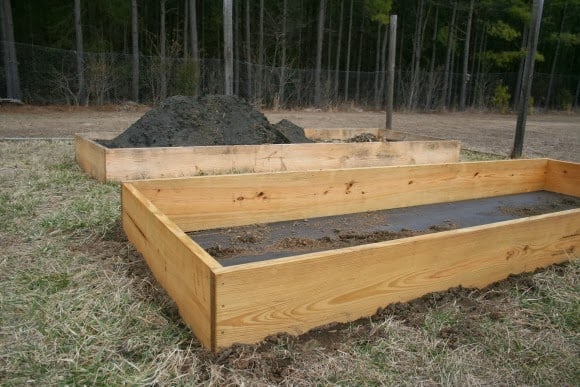
New garden bed (empty) and rebuilt bed (with soil pile).

The steps for replacing a raised vegetable garden bed are very similar to the steps to build one. Below is an outline of what we did to replace the raised garden bed.
 .

.

Materials Needed

  • Three boards of untreated lumber 8 feet long x 12 inches high x 2 inches wide (8′ x 12″ x 2″)
  • Drill
  • 4″ or 6″ screws, four for each corner, 16 screws total
  • Protective paint and paintbrush 
  • Saw
  • Saw horses
  • Landscape fabric
  • Hammer
  • Heavy duty wood staples
  • Scissors
  • Tape measure
  • Pencil


How to Build a Raised Bed for a Vegetable Garden


  1. Measure the wood to cut one board in half so you have two pieces exactly 4 feet long. Place board on saw horse and with a helper, measure, mark with a pencil, and saw in half.
  2.  Place boards on the saw horse and paint each side, including ends, with the protective paint.  We used a wood sealant with a bit of tint to it, but you can use clear. We’ve found that the paint adds a year or more of life to the wood by placing one added barrier between untreated lumber and the elements.
  3. Allow the paint to dry thoroughly. Drying time will depend on the weather conditions, but on a dry, breezy day it takes about an hour or two.
  4.  Move the lumber into position in the garden. You will build the bed upside-down and then flip it into position, so you need at least two people.  Place the “bad” or ugly side of the wood, if any, facing up. When you flip the garden bed  frame, the ‘bad’ side will then face down.
  5. With a helper, hold the short board inside the long board, making a 90″ degree angle in the corner. Using the drill, drill two holes, top and bottom, about 1″ from the edge, into the wood to affix the sides. Then drill two more holes and screw in the screws. Do the same with the other long board, making sure it is as even as possible with the other piece of wood. When three sides are attached, attached the other short side.
  6.  With your helper, stretch the roll of landscape fabric out so you run it over the length of the frame. Use the staples and the hammer to tack it onto the side of the frame, making it tight like the skin of a drum. You will need to run two lengths of fabric. Trim the edges and nail it neatly to the bottom.
  7. With your helper, carefully pick up the frame and turn it over. It will be HEAVY so you may need more people. Don’t hurt yourself! Once it is in position, you may need to shift it into the right spot. We needed to even out the ground underneath to remove stones; you may need to do the same thing to get the bed to stay as level as possible. If it’s not level, it will be okay, but it will put extra stress onto the corners and wood of the raised garden bed frame.
  8.  Once the raised vegetable garden bed is in position, you now have a bed with bottom (made of landscape fabric over the ground) and four sides 12″ high. Fill with your choice of soil and amendments to a depth of 10″, leaving about 2″ of room from the top of the garden bed to the soil level. The soil may settle after the first watering or two, so add more if the level drops.

.
.
The picture below shows a close up of the corner of the raised bed, demonstrating how we attached the screws.  You can also see the landscape fabric stretched tightly across the bottom of the bed; when we assembled it, it was on top, but we turned the frame over to place it on the bottom. 
 .
.
Since this bed is a replacement for the old one that broke down over time, the soil from the old bed is piled up on the opposite garden beds. The one behind the newly constructed bed is the garden bed my husband and nephew built last summer. You can already see how the sun has bleached the wood, protective paint or no protective paint. Virginia’s summer sun can be super strong.
 

raised vegetable garden bed
New raised vegetable garden bed in place.

 
Now is the time to replace any vegetable garden beds that have broken down over the winter, or build your new raised vegetable garden. With the right soil, you’re on your way to growing delicious vegetables right at home!

My Book on Raised Bed Vegetable Gardening

Amazonraisedbedcover


My book, Plan and Build a Raised Bed Vegetable Garden, walks you step by step through everything you need to know to plan and build a great vegetable garden. It includes detailed information on where to build your garden beds, how to build them, materials for pathways and more. Available on Amazon in paperback or Kindle.

Jeanne
Jeanne

Jeanne Grunert is a certified Virginia Master Gardener and the author of several gardening books. Her garden articles, photographs, and interviews have been featured in The Herb Companion, Virginia Gardener, and Cultivate, the magazine of the National Farm Bureau. She is the founder of The Christian Herbalists group and a popular local lecturer on culinary herbs and herbs for health, raised bed gardening, and horticulture therapy.

Tweet
Share
Pin1
Share
1 Shares

Filed Under: Vegetable Gardening Tagged With: steps to build a raised bed

Previous Post: « Mushroom Growing Workshop in Prince Edward County, Virginia
Next Post: Can You Use Pressure Treated Wood in a Vegetable Garden? »

Reader Interactions

Comments

  1. Heather

    February 3, 2016 at

    This is FABULOUS! I have been wanting to do exactly this for a while now! Thank you for the great tutorial! I’m pinning for later 😀

Trackbacks

  1. Can You Use Pressure Treated Wood in the Vegtable Graden? | Home and Garden Joy says:
    October 20, 2014 at

    […] you use pressure treated wood in a vegetable garden? After my last several posts on building a raised bed vegetable garden, a few loyal readers wrote to ask if using pressure treated lumber is okay in a vegetable garden. […]

  2. New Video on Raised Bed Vegetable Gardening - Home and Garden Joy says:
    June 11, 2015 at

    […] Steps to Build a Raised Bed Vegetable Garden […]

  3. Spring Vegetable Garden Updates says:
    March 6, 2018 at

    […] in doubt, use cedar for your raised garden beds. It resists rot and is not treated with chemicals. It is expensive, however. Plain untreated pine […]

  4. Cold Frame vs Greenhouse - Home Garden Joy says:
    October 8, 2018 at

    […] houses made from PVC or wire frames and heavy-duty plastic make fine cold frames. I convert my raised beds into cold frames by adding a heavy, repurposed window (salvaged from a school being remodeled) and […]

Primary Sidebar

Let’s Connect!

  • Facebook
  • Instagram
  • Pinterest
  • RSS
  • YouTube

Featured

logo of the american horticulture society

Home Garden Joy was featured by the American Horticultural Society on #plantchat.

My Books on Amazon

cover of plan and build a raised bed garden

Visit my author page on Amazon to find all of my fiction and gardening books.

Herbal Academy Teachers

Footer

a browned overcooked coconut bar on a blue flowered plate

Recipe Fail – Coconut Bars

Each weekend, I dig out my favorite cookbook – the Fannie Farmer Cookbook, 13th Edition. I flip through the pages, skimming the recipes, checking to see if I have the ingredients to make those that catch my eye. And then, I make the recipe, usually late Sunday afternoon after all the chores are done. It’s…

Read More

peach tree cuttings in a pot on a windowsill

Propagating Peach Trees from Softwood Cuttings

We decided that propagating peach trees from softwood cuttings was the way to go when we couldn’t find the variety we wanted at the store this past week. The best eating peach we’ve ever grown here at Seven Oaks Farm is “Red Haven.” It was recommended by our neighbor, a man whose family has farmed…

Read More

soul in a yellow mug against pine panelling

Made From Scratch Chicken Vegetable Soup Recipe

This is the best made-from-scratch chicken vegetable soup recipe you’ll ever taste. It’s a favorite of my family and I’m betting it will quickly become a favorite of your family’s, too. As part of my ongoing quest to test and taste every recipe in the Fannie Farmer Cookbook 100th Edition, I’ve made the Vegetable Soup…

Read More

A loaf of bread on a plate

Water Bread – Recipe Review

Once you make water bread, you’ll never eat store bought white bread again. In fact, you won’t be able to look at a loaf of “white bread” from the market and consider it bread, in any sense of the word, after you’ve taken a bite of the real thing. Hot. Crunchy crust. Tender, flaky, soft…

Read More

Copyright © 2022 Home Garden Joy on the Foodie Pro Theme