
What’s Halloween without a jack o’lantern? These pumpkin carving tips will help you create the best jack o’lantern ever. Plus, tips for choosing pumpkins, new pumpkin decorating ideas and more.
Pumpkin Carving Tips
When I was a little girl, carving our Halloween pumpkins was a treat I looked forward to every year. The weekend before Halloween, my father would bring home one huge pumpkin and a smaller pumpkin for me to carve. The big one was for the family, the small one for me, the baby of the family. We’d spread newspapers in the driveway or on the basement floor and my parents or an older sibling would use the big steak knife to cut out a hole around the top of the pumpkin. From then on, it was my job to scoop out the goo and seeds, carve a face, and place the candle inside. I wasn’t allowed to light it until Halloween, and we had to sit and ‘babysit’ our pumpkins, both to prevent fires and to prevent the big kids from smashing them in our neighborhood. Teens would go around and smash kids jack o’lanterns just out of meanness on Halloween.
But oh, the pumpkins! The choices! Each year, I’d think about what I would carve. Scary pumpkin or friendly pumpkin? Scary always won out. Friendly jack o’lantern meant the eyes were right-side up triangles and the toothed smile was upturned…scary meant that the eyes were upside-down triangle and the mouth turned down in an evil grimace.
Carving Tips
Pumpkins can be tough to carve, but hey, they’re better than the turnips that used to be used as jack o’lanterns by the Irish, who brought the tradition to America. The top of the pumpkin where the stem connects to the fruit is actually the toughest part of the entire pumpkin, and more difficult than any other to cut.
Some people actually use a small electrical saw to cut the top off, but I say that’s cheating. Whether you use a saw, electrical saw or large knife, ALWAYS have an adult in the family do the major surgery to open up the pumpkin. It’s easy to slip with the knife on the tough skin, so be careful.
One way to open up the pumpkin without fussing with the tough, fibrous top skin is to open the back of the pumpkin. You can cut an oval “hatch” in the back to open up the back-end and reach the interior.
Whatever you do, cut the lid off at an angle, not straight up and down. This prevents the lid from dropping into the interior of the pumpkin. The angle forms a ‘plug’ for the top.
Scooping Out the Seeds
Inside the pumpkin is a fibrous knot of seeds and flesh that must be removed before carving. This is the gross part. As a kid, I’d use my hands and a big tablespoon. Metal ice cream scoops work best today to remove the goo.
The pulp and seeds can be thrown away, or you can leave them on a paper plate in the yard for squirrels and birds.
You can eat pumpkin seeds. Remove the seeds from the pulp and rinse them in a colander under cool water, then spread them in a thin layer to dry. When dry, place the seeds, a tablespoon of melted butter and a sprinkle of coarse salt in a bowl. Stir to mix and coat the seeds with butter and salt. Preheat the oven to 300 degrees F and spread the seeds on a baking sheet. Bake for 45 minutes until golden brown, stirring frequently to prevent burning. Enjoy the snack!
Drawing the Face
Of course there are all sorts of kits to carve the perfect pumpkin, but what’s the fun of that? You can draw the face on your pumpkin with a pencil or an erasable marker, the kind used on white boards. Erasable markers are easiest because if you don’t like how it looks, just take a paper towel and rub off the marker and start again.
To make perfect triangles for eyes and nose, a cookie cutter works well as a template. Trace around a diamond or triangle cookie cutter.
Carve the Face
Again, grownups should wield the knives here…or the power tools. Many people today prefer power tools, but knives work just fine to cut the face out of the pumpkin. Serrated blades work best.
Add Candles
Set your candle inside the pumpkin and affix it to the interior with a bit of melted wax for a traditional jack o’lantern. You can also use electric candles, the kind powered by batteries, for safety. Keep the lid off of your jack o’lantern while the candle is lit.
Preserving the Pumpkin
Want to keep your pumpkin from rotting? Spray it with bleach-based cleaner. I know, that sounds sick, but it actually kills some of the bacteria that rots the pumpkin. (Thanks to Extreme Pumpkins for that tip). Petroleum jelly smeared over the cut surfaces keeps it from shriveling up.
After Halloween: Discarding Your Pumpkin
If you didn’t spray the pumpkin, compost it. I usually cut my pumpkins up and leave them for the squirrels, birds and other wildlife to enjoy.
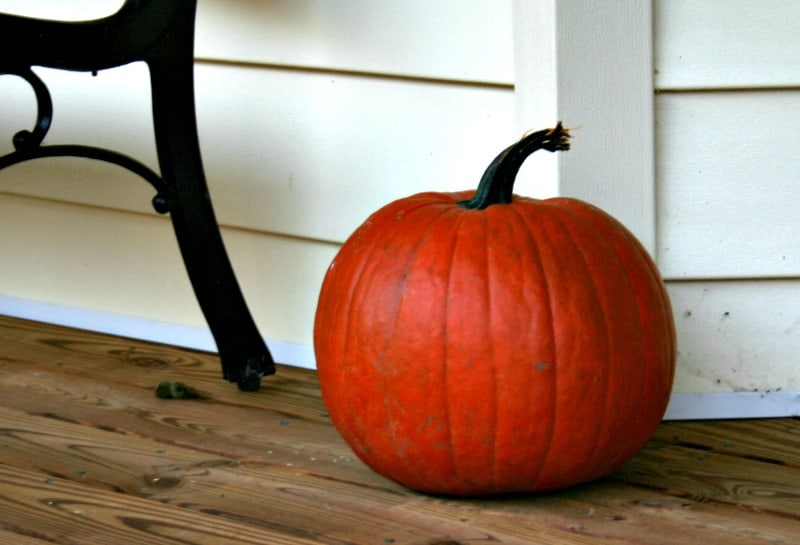
Choosing a Pumpkin
When choosing a pumpkin to carve a jack o’lantern, look for one that has a great shape with plenty of surface area for carving. Some people prefer taller pumpkins, others round ones. It doesn’t matter as long as there is enough surface area and a fairly symmetrical shape to the pumpkin to enable easy carving.
Make sure the pumpkin has enough stem left so that you can grab it and use the stem as a handle to pull the top off and replace it easily. It’s hard to remove the lid on a jack o’lantern without a stem.
Lastly, inspect the bottom of the pumpkin in the store, and feel around the outside of it. It should feel heavy and firm. If it feels mushy at all, don’t buy it. It’s past its prime and won’t last long enough to carve.
What Does a Teal Pumpkin Mean?
It must be awful to be a kid with severe food allergies at Halloween…some kids can’t even go trick or treating because the threat of peanut-laced treats is enough for moms to keep them safe. A new project called the Teal Pumpkin Project offers a non-food treat for trick or treaters so that kids with food allergies can still enjoy the holiday without worry.
Homes who wish to participate in the Teal Pumpkin Project paint a pumpkin teal (a light robin’s egg blue color) and leave it on the porch. That signals families and children that the home has non-food treats available. Teal Pumpkin Project participants give away small toys, boxes of crayons or other non food treats to trick or treaters. Dollar stores are a great place to stock up on fun non-food items.
Some ideas for inexpensive non-food items: ($1 each or less)
- Boxes of crayons
- Dollar store toys – cars, trucks, games, puzzles
- Coloring books
- Stickers
- Erasers or fun pens, pencil sets
- Action figures, plastic dinosaurs, horses or farm animals
- Books (gently used is okay and very inexpensive)
For more information on how your family can participate in the Teal Pumpkin Project, visit the organization’s website.
More Halloween Fun!
If you enjoyed this article, you may also want to check out the following articles on Home Garden Joy:
Whatever Happened to Halloween?
Spooky Stories for Halloween

Did you know that I wrote a book of short Halloween stories? An Ancient Gift and Other Stories features three tales of the supernatural that are spooky…without being gory or glorifying evil. They’re suitable for teens and adults.
Paperback is also available on Amazon.com


I love the teal pumpkin project! We will be doing that this year.
Great tips…I am always messing up my pumpkins! I will implement some of your tips this year, xo!
Halloween has not been popular in Australia until recent years so I missed the years of pumpking carving. Thanks for a great post and it looks scary!! #AnythingGoes
These are so helpful! I was always cutting up and down to get the lid off, so the angle makes so much more sense!
What a lot of great pumpkin tips! I’ve never heard of cutting an oval “hatch” in the back. I’ll have to remember that one if I end up with a tough top. Thanks for sharing with the #made4kids blog party!
First of all, these are great tips. But most importantly, I have never heard of the Teal Pumpkin Project! What a great idea! I’ll definitely spread the word and participate, too. Thanks for making me aware and for sharing at Inspiration Thursday! Have a great week!