A recipe to make your own simmering potpourri that’s easy to make – yes, it’s here!
Do you love the smell of Christmas? Who doesn’t? This recipe for all-natural simmering potpourri uses homemade ingredients and spices that are easy to find at the grocery store. Add a beautiful hand-crafted gift jar, and you have the perfect inexpensive homemade Christmas gift or stocking stuffer!
Make Your Own Simmering Potpourri
Simmering potpourri is wonderfully simple to make, and part of its charm is how flexible the process can be. At its core, it is just a blend of fragrant ingredients gently heated in water to release their aroma throughout your home. You can tailor the scent to the season, your mood, or whatever you have on hand, which makes it both practical and creative.
You can purchase every component if convenience is your priority. Grocery stores and spice shops carry dried citrus, cinnamon sticks, whole cloves, star anise, vanilla beans, and herbs that work beautifully in simmering blends. Many people also buy pre‑mixed potpourri ingredients, which can be a quick way to experiment with different scent combinations without gathering items individually.
If you prefer a more personal touch, you can make many of the ingredients yourself. Citrus peels can be dried in the oven or air‑dried on a counter, herbs can be snipped from your garden, and apple slices can be dehydrated for a warm, cozy aroma. Even leftover ingredients from cooking or baking can be repurposed. This do‑it‑yourself approach not only saves money but also lets you craft unique blends that feel truly your own.
My Ingredients: Dry Your Own
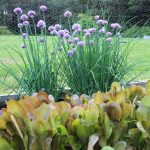
I dry my own ingredients for potpourri. This includes petals from roses in my garden, lemon and orange peels, and various herbs. I also purchase cloves and other spices to add zest to the ingredients.
- Dried lemon and orange peels: This recipe calls for dried lemon and orange peels. I save lemon, orange, clementine, and tangerine peels. While the peels are fresh, I use a sharp paring knife and scrape off as much of the pith (white) material from inside the peel. Then, I cut the peels into small squares and place them on a paper towel spread out on a plate. Place the peels in a single layer and place the plate of peels in a dry, warm location for a few days. When they feel dry to the touch, add them to your herbal storage jars. Leave the top off to keep them dry. Conventionally grown fruit is fine to use for simmering potpourri. Use organic fruit if you plan to add the peels to tea mixes or use them in recipes. Dried lemon and orange peels are also available at some specialty grocery stores.
- Cinnamon sticks: You will need approximately 6 to 8 cinnamon sticks. I buy mine at the grocery store. I can even find them at the dollar store on some lucky days!
- Bay leaves: Grab them from the spice aisle at the grocery store.
- Whole cloves: A can or bottle of whole cloves can also be found at the grocery store.
Make the Jar
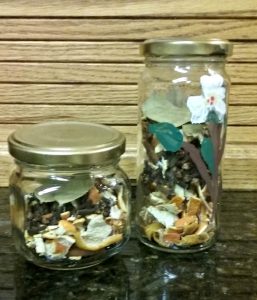
First, you will need a clean, empty jar. You can use a mason (canning jar) or recycle a glass jar. The jars in this picture are from olives (the tall jar) and artichoke hearts (the small jar). Rinse empty jars with warm, soapy water. Soak them to get the labels off and use nail polish remover to remove any residual glue from the outside. Place the jars in the dishwasher (if you have a dishwasher) and run it through a regular cycle with your dishes.
I spray paint the jar lids using gold, green, or another festive Christmas color. Do this outside and put cardboard or newspaper on the ground to catch the excess spray. One coat covers most jar lids, although the artichoke heart jar lid was a dark blue and required two coats.
Next, you can paint the outside of the jar using acrylic paints. I left the small jar plain and painted dogwood blossoms on the tall jars. It’s up to you how you want to decorate them!
Fill the Jar
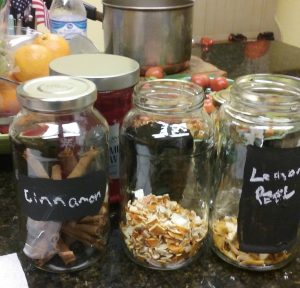
Now it’s time to fill the jar. Place layers of simmer potpourri ingredients in each jar:
- Broken cinnamon sticks – add 3 broken sticks (6 halves) or more for a larger jar.
- Lemon peel – add a layer
- Orange, tangerine or clementine peel – add a layer
- Cloves – add a layer
- Bay leaves – place 2-3 bay leaves on top.
- Place the lid on the jar. Tie with a decorative ribbon, piece of burlap or string.
I like to make tags to tie to the jars with the instructions on how to make the potpourri. You can download and print a tag, below. Print it onto regular printer paper and cut to size with scissors. Feel free to adjust the size as needed.
Enjoy!