
Everything you ever wanted to know about how to harvest garlic: when and how to harvest as well as how to properly cure (dry) it for storage.
The Complete Guide to Harvesting and Storing Garlic
For home gardeners, few moments are as satisfying as pulling that first bulb of garlic from the soil and discovering fat, perfectly formed cloves wrapped in papery white layers. But garlic is a crop that demands patience, precision, and a bit of know-how. Harvest too early, and you’ll end up with small, underdeveloped bulbs. If you wait too long, the protective wrappers split open, leaving your garlic vulnerable to disease and drastically shortening its storage life.
If you’ve invested months nurturing your garlic from fall planting through winter dormancy and spring growth, you owe it to yourself to master the final—and arguably most critical—stages: harvesting, curing, and storing. Get these steps right, and you’ll enjoy your homegrown garlic for six months or more without a single sprouted clove. Rush through them or skip crucial steps, and you might find yourself with a mushy, moldy disappointment.
This comprehensive guide walks you through every stage of the garlic harvest process, from recognizing the telltale signs of readiness to creating optimal storage conditions that keep your bulbs fresh well into winter.
Understanding Garlic’s Growth Cycle
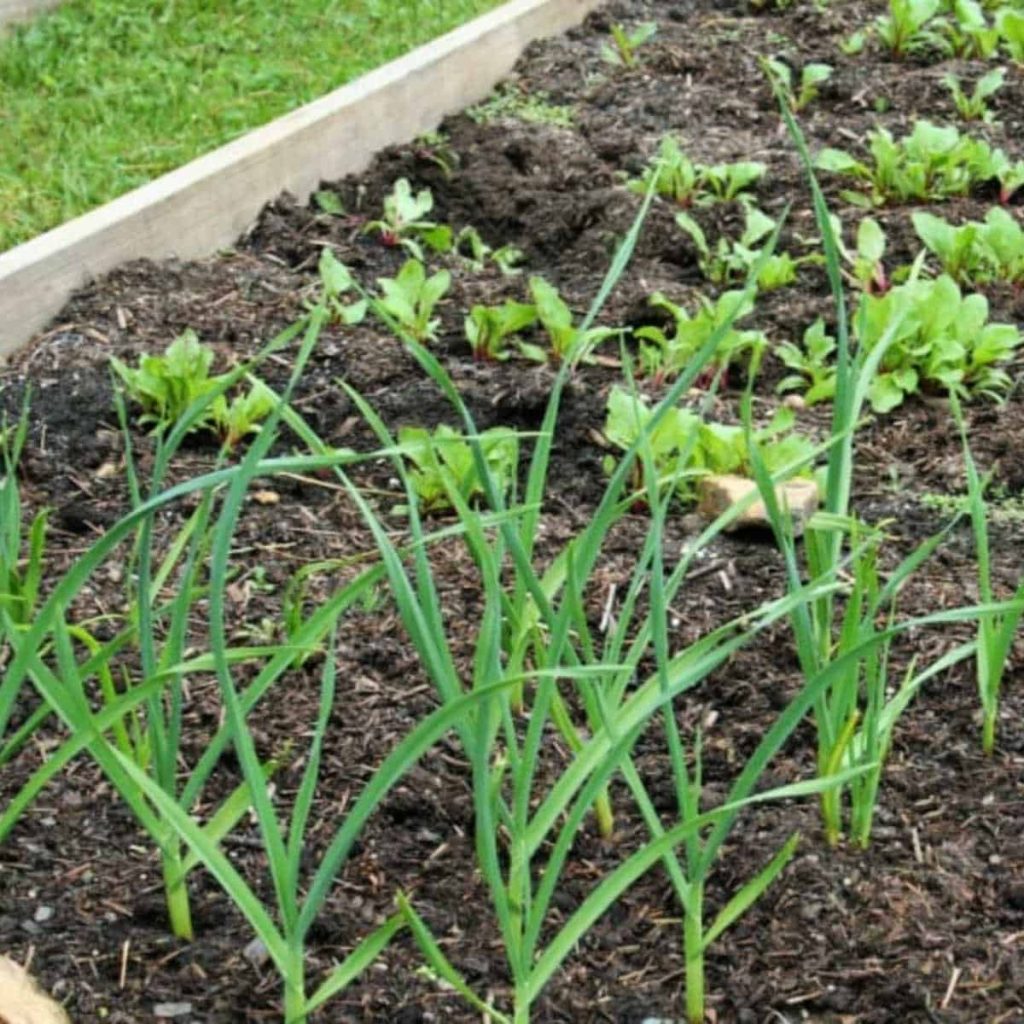
Before we dive into harvest timing, it helps to understand garlic’s unique growing pattern. Unlike most vegetables that complete their life cycle in a single season, garlic is typically planted in the fall, usually in October or November in most temperate climates. Here in central Virginia, Zone 7B, we plant around Columbus Day weekend, or the second weekend in October. The cloves establish roots before winter, lie dormant through the cold months, then surge into active growth as temperatures warm in spring.
This long growing season, often eight to nine months, is what allows garlic to develop those complex, pungent flavors and substantial bulb size. The plant channels energy first into leaf production, then gradually shifts focus underground as days lengthen, forming the individual cloves that make up each bulb.
The transition from growth to maturity is gradual, and learning to read the plant’s signals is essential for timing your harvest perfectly.
When Is Garlic Ready to Harvest?
Timing truly is everything with garlic. Harvest at the optimal moment, and you’ll maximize both bulb size and storage potential. The sweet spot typically arrives in late spring to mid-summer, depending on your climate and when you planted, but the calendar date matters less than what the plant itself is telling you.
Reading the Leaves: Your Most Reliable Indicator
Your garlic plant’s foliage functions as a direct communication system, broadcasting its underground status through visible changes above ground. The key is monitoring the progression of leaf dieback from the bottom up.
When the bottom three to four leaves have turned brown while the top leaves remain green, your garlic has reached prime harvest time. This specific pattern isn’t arbitrary. It reflects important changes happening at the bulb level.
Here’s why this matters: each green leaf above ground corresponds to one layer of protective wrapper around the bulb below. These papery sheaths are your garlic’s armor against moisture, disease, and physical damage during storage. Harvest when too many leaves are still green, and you’ll have underdeveloped cloves that haven’t reached their full size potential. Wait until all the leaves have browned, and those protective wrappers begin to deteriorate and split, leaving cloves exposed and vulnerable.
The ideal balance of three to four brown leaves with green remaining at the top ensures your bulbs have matured fully while retaining enough protective layers for successful long-term storage.
The Scape Signal for Hardneck Varieties
If you’re growing hardneck garlic varieties (distinguished by their stiff central stalk and tendency to produce fewer but larger cloves), you’ll receive an additional timing clue about four to six weeks before harvest: the emergence of scapes.
These curly, whimsical flower stalks emerge from the plant’s center, eventually straightening and forming small bulbils at the tip. While they’re beautiful and the bulbils can be planted to grow new garlic, leaving scapes on the plant diverts energy away from bulb development.
Most gardeners snip off scapes when they’ve made one or two full curls. This redirects the plant’s resources back underground, resulting in larger, more robust bulbs. As a bonus, garlic scapes are delicious (yes, you can eat them): mild and slightly sweet, perfect for pesto, stir-fries, or simply sautéed as a side dish.
The appearance of scapes serves as a helpful countdown clock: mark your calendar, and start watching those lower leaves closely in four to six weeks.
Conducting a Test Dig
When you think your garlic might be ready based on leaf color, don’t commit to harvesting your entire crop just yet. Instead, sacrifice one bulb for reconnaissance.
Choose a plant that looks representative of your crop—not the largest or smallest, but somewhere in the middle. Use a trowel or garden fork to carefully loosen the soil several inches away from the stem, then gently lift the bulb.
What you’re looking for:
- Plump, well-defined cloves that fill out the bulb completely
- Tight wrappers that completely cover individual cloves without gaps or splitting
- A firm bulb that feels solid when you squeeze it gently
If the bulb looks more like a single rounded mass without clear clove definition, it needs more time. If the wrappers are splitting and individual cloves are separating, you’ve waited a bit too long—harvest the rest of your crop immediately.
This test dig takes the guesswork out of harvest timing and is well worth the sacrifice of a single bulb.
How to Harvest Garlic Without Damaging It
You’ve waited months for this moment, watching over your garlic through winter snows and spring rains. Don’t let careless harvesting techniques undo all that careful cultivation. Garlic bulbs are surprisingly fragile, and any bruising, nicking, or damage to the wrappers will shorten storage life or provide entry points for rot.
Pre-Harvest Preparation
About a week before you plan to harvest, stop watering your garlic completely. This allows the soil to dry out, which serves several purposes. Dry soil is easier to work with and doesn’t cling to bulbs as stubbornly as wet soil. More importantly, drier conditions at harvest time mean less moisture is introduced to the bulbs, reducing the risk of rot during the curing process.
If rain is forecast just before your planned harvest, consider waiting a few days afterward for the soil to dry out naturally.
How to Harvest Garlic
The cardinal rule of garlic harvesting: never pull the plant straight up by its leaves or stem. That stem-to-bulb connection is weaker than you think, and yanking upward often results in you holding a fistful of leaves while the bulb remains underground. or worse, with a damaged stem that compromises curing.
Instead, approach from below:
- Position your gardening tool properly: Use a garden fork, spading fork, or trowel, and insert it into the soil about four to six inches away from the stem. This safe distance prevents you from spearing the bulb itself.
- Loosen, don’t lift: Dig down about eight inches or so and rock gently to break up the soil and loosen the bulb’s grip. Work your way around the plant if the soil is particularly compacted.
- Lift from underneath: Once the soil is thoroughly loosened, slide your hand or tool under the bulb and lift upward. The bulb should come free easily with its stem still firmly attached.
- Handle gently: Treat harvested bulbs like eggs. Even small bruises or nicks in the wrapper can become rot spots during storage. Lay them carefully in a container or directly on the ground—don’t toss them into buckets.
The Dirt Question
Your freshly harvested garlic will emerge with soil clinging to the roots and wrappers. Resist the urge to wash it clean. Water at this stage introduces unnecessary moisture that can lead to rot during curing.
Instead, gently brush away loose dirt with your hands or a soft brush. Some soil stubbornly adhered to the roots and wrapper is fine. I will dry and flake off naturally during the curing process. What’s important is removing heavy clumps that might hold moisture or prevent good air circulation.
If your garlic is extremely muddy because you harvested from wet soil, let it air-dry in its muddy state for a day in a shaded, ventilated area before attempting to brush it off. The dried mud will release much more easily.
How to Cure Garlic for Long-Term Storage
If harvesting is crucial, curing is absolutely essential. This is the process that transforms your freshly dug garlic from a perishable fresh vegetable into a long-storing staple that can last six months or more.
Fresh garlic contains a significant amount of moisture in its stems, leaves, and wrappers. Curing gradually draws that moisture out through evaporation, creating the papery, protective layers that seal each bulb and prevent spoilage. Skip curing, and your garlic will either sprout prematurely or develop soft spots and rot within weeks.
Setting Up Your Curing Space
The ideal curing environment has four key characteristics:
Dry: Humidity is the enemy during curing. Aim for a location with low humidity where air doesn’t feel damp or heavy.
Shady: Direct sunlight can damage bulbs, causing sunscald or uneven drying. A covered porch, garage, shed, or barn works perfectly.
Well-ventilated: Air circulation is crucial for even drying and preventing mold. Avoid enclosed spaces without airflow like closed boxes or plastic containers.
Moderate temperature: Temperatures between 70-80°F are ideal, though garlic is fairly forgiving. Avoid extreme heat, which can cook the bulbs, or cold, damp conditions.
I use my garage to cure onions and garlic. In the early fall in Virginia, temperatures are perfect, and it is completely protected from moisture.
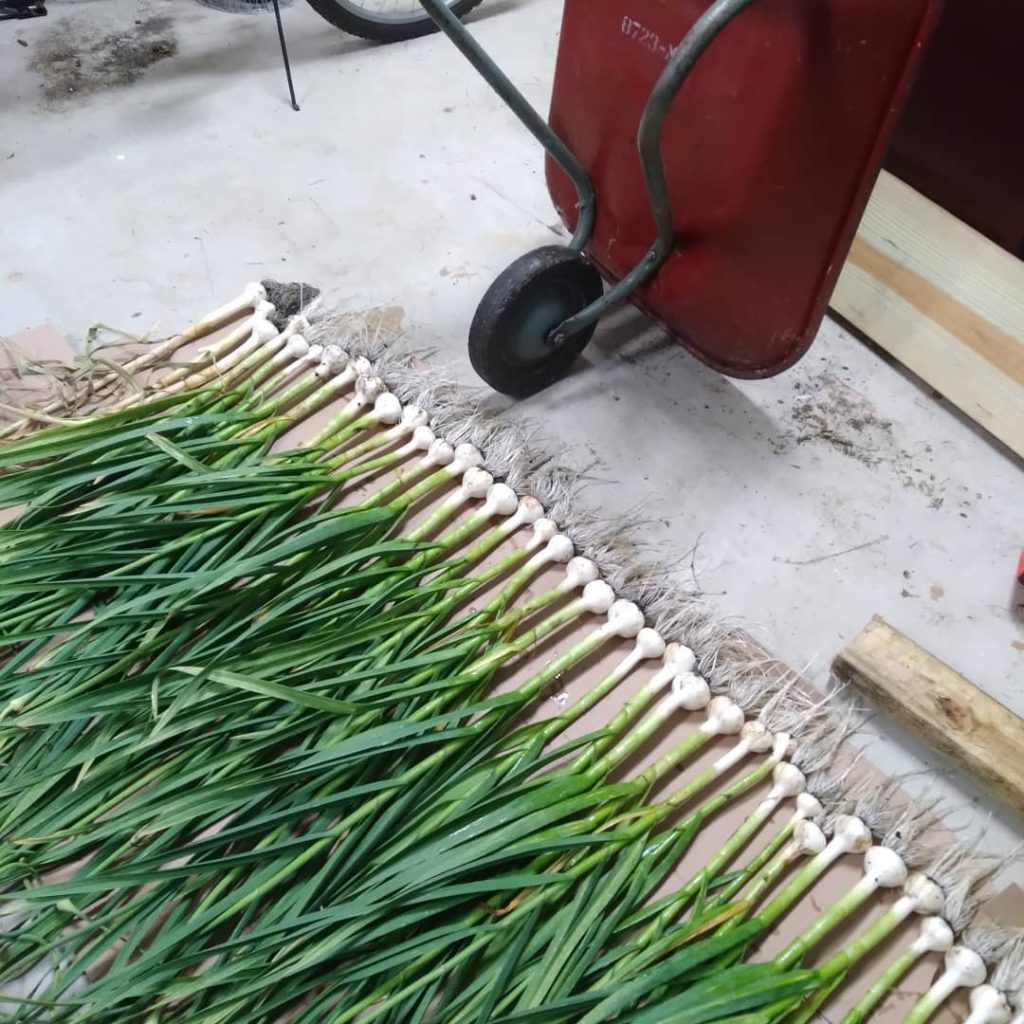
The Curing Setup
Lay your garlic bulbs in a single layer on a surface that allows air to circulate from below. Excellent options include:
- Raised wire racks or screens
- Slatted wooden shelves
- Hanging in small bundles from rafters
- Newspaper or cardboard laid over elevated surfaces (though this reduces bottom airflow slightly)
Leave the stems, leaves, and roots attached during curing. The moisture in these plant parts will gradually migrate outward and evaporate, and removing them prematurely interrupts this process.
Space bulbs so they’re not touching or tightly packed. Good air circulation around each bulb prevents moisture from being trapped between them.
The Waiting Game
Curing typically takes two to four weeks, depending on bulb size, humidity levels, and temperature. You’ll know your garlic is properly cured when:
- The wrappers feel papery and rustle when touched
- The neck (where the stem meets the bulb) is completely dry and tight
- The outer wrappers have a dry, papery texture
- Roots have dried to brittle threads
Check your garlic every few days during curing. If you notice any bulbs developing soft spots or mold, remove them immediately to prevent spread. These damaged bulbs should be used quickly in cooking rather than stored.
How to Store Garlic Without Sprouting
You’ve harvested carefully and cured patiently. Now it’s time to set up storage conditions that will keep your garlic fresh for months. Properly cured and stored garlic can last six months or more without sprouting, shriveling, or rotting.
Post-Cure Trimming
Once curing is complete, it’s time to prep your bulbs for storage:
Trim the roots: Cut them flush with the bottom of the bulb or leave about a quarter-inch stub. Removing the roots prevents them from absorbing moisture from the air.
Cut the stem: Trim it to about one inch above the bulb. This removes the dried foliage while leaving enough stem to protect the top of the bulb.
Exception for softneck varieties: If you grew softneck garlic (the type with flexible stems), you can skip trimming and instead braid the stems together for both functional storage and decorative appeal. Garlic braids hung in the kitchen combine convenience with rustic charm.
Optimal Storage Conditions
The ideal garlic storage environment balances several factors:
Temperature: Around 60-65°F is perfect. This is cooler than typical room temperature but warmer than refrigerator temperature. A basement, pantry, or cool closet often works well.
Humidity: Low humidity prevents mold while avoiding the extremely dry conditions that cause cloves to shrivel. Around 60-70% relative humidity is ideal.
Darkness: Light, especially sunlight, can trigger sprouting and cause greening. Store garlic in a dark location or in opaque containers.
Air circulation: Avoid airtight containers that trap moisture. Garlic needs to breathe.
Storage Containers and Methods
The best storage options allow airflow while protecting bulbs from light:
Mesh bags or net bags: These provide excellent ventilation and are easy to hang in your storage area.
Wire baskets: Open wire baskets work beautifully and allow you to easily see and access your garlic.
Paper bags: Brown paper bags with the top folded down provide darkness while allowing some air exchange.
Braided strands (for softneck): Hung in a cool, dark pantry or closet, these are both functional and attractive.
Avoid plastic bags, sealed containers, or the refrigerator. Despite common misconceptions, refrigerator storage is problematic for garlic. The high humidity encourages sprouting, and the cold temperatures can alter texture and flavor. The only exception is peeled or chopped garlic, which should be refrigerated and used within a few days.
Advanced Storage Tips
For gardeners serious about maximizing storage life, these techniques can help:
Moisture control additives: Place dry tea leaves or a small open container of baking soda in your storage area. Both substances naturally absorb excess moisture from the air, helping prevent mold without over-drying your garlic.
Separation from ethylene producers: Keep garlic away from ethylene-producing fruits and vegetables like apples, tomatoes, bananas, and potatoes. Ethylene gas accelerates sprouting and can cause garlic to deteriorate faster.
Regular inspection: Check your stored garlic every few weeks. Remove any bulbs showing signs of sprouting, soft spots, or mold. Use these questionable bulbs first, cutting away any problematic areas.
Variety selection: Some garlic varieties naturally store better than others. Softneck varieties typically outlast hardneck types, often storing eight months or more compared to four to six months for hardnecks.
Troubleshooting Common Storage Problems
Even with careful curing and storage, issues sometimes arise:
Sprouting: Green shoots emerging from cloves indicate the garlic is breaking dormancy. This typically happens due to temperature fluctuations, exposure to light, or natural aging. Sprouted garlic is still edible; simply remove the green shoot, which can taste bitter. Use these bulbs promptly as sprouting depletes stored energy and flavor.
Shriveling: Cloves becoming soft and wrinkled suggest the storage area is too dry or warm. Move garlic to a cooler location or add a humidity source like a small open dish of water nearby (but not touching the garlic).
Mold or soft spots: This indicates too much moisture, either from insufficient curing or humid storage conditions. Remove affected bulbs immediately, improve air circulation, and consider adding moisture-absorbing materials to your storage area.
Yellowing wrappers: Some discoloration is normal as garlic ages, but extensive yellowing or browning can indicate the bulbs are nearing the end of their storage life. Use these bulbs soon.
Looking Ahead: Planning for Next Season
As you enjoy your harvested garlic through fall and winter, start thinking about next season. Save your largest, healthiest bulbs for replanting in fall. They’ll give you a head start on even bigger bulbs next year.
Consider keeping notes on harvest timing, curing conditions, and storage success. This information becomes invaluable year after year, helping you fine-tune your techniques for your specific climate and growing conditions.
Pay attention to which varieties store longest in your conditions. This practical experience will guide your variety selection for future plantings, ensuring you grow garlic that not only tastes great but also fits your storage capabilities.
My First Garlic Harvest (2010)
The first of the garlic harvest is in and my front porch smells like an Italian restaurant. This is the first time I have ever grown garlic. No one that I knew back on Long Island grew it, maybe because none of our root vegetables ever came out nice. With the raised beds I do very well with root vegetables so I gratefully accepted a bag of cloves to plant last fall from my neighbor Patty. She told me the folklore of planting garlic: Plant on Columbus Day (around October 12) and harvest on July 4th.
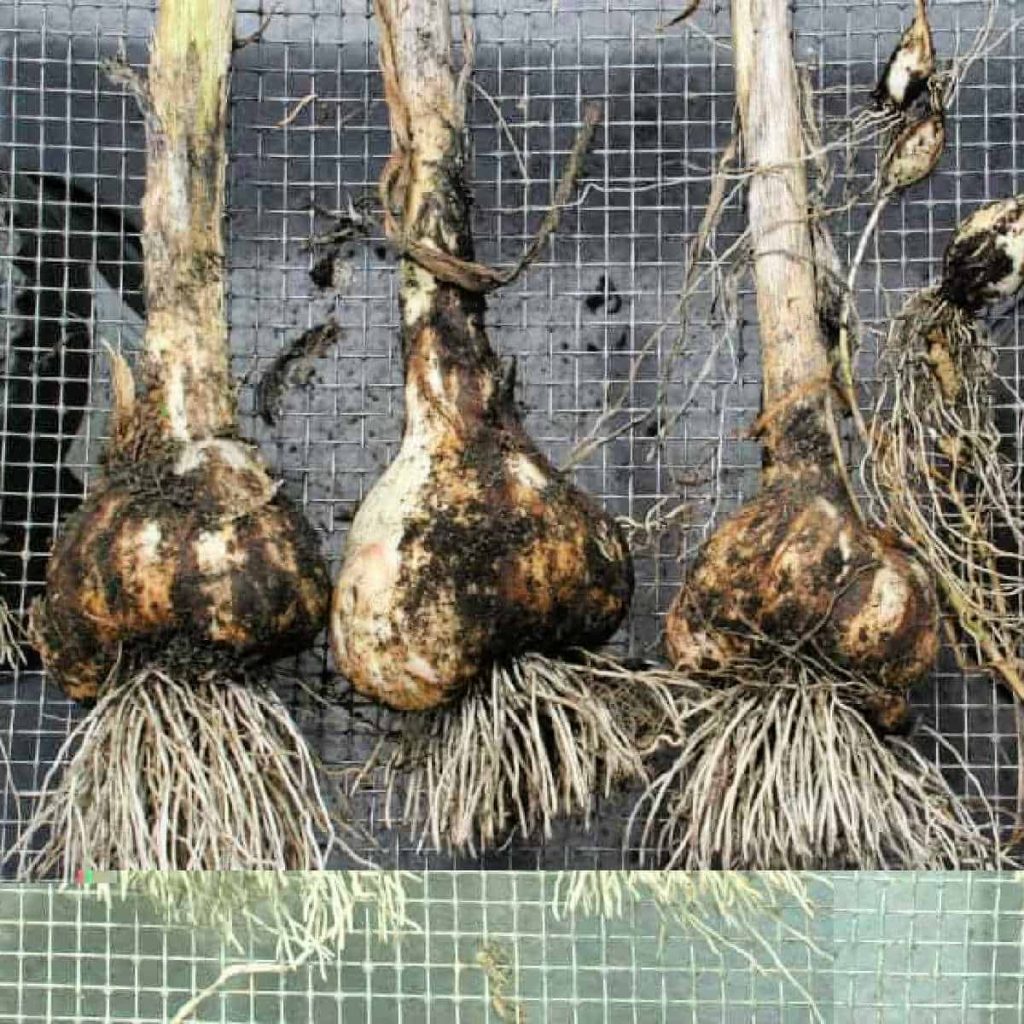
Well it is about two weeks early for the harvest, but the tops are brown and falling over which is a sure sign it’s time to pull them up. I had to use my hoe to dig into the ground a bit to get the bulbs out hidden under the earth. Some of the tops had already rotted off.
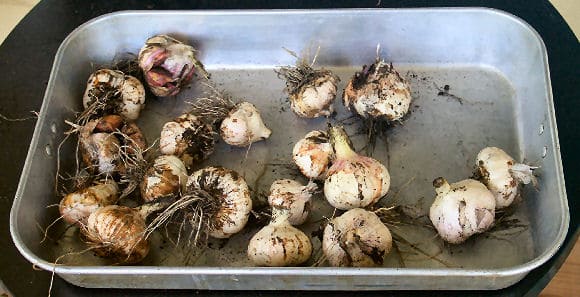
After pulling them out, I put them in a big bucket, then sat on the porch and cut off the tops and bottoms. I used a stiff bristle scrub brush to scrub off the outer layer of skin on the bulbs, which also gets the dirt off. Then I put them in my trusty roasting pan and left the whole batch out on the front porch to dry.
With today’s high temperatures expected near 100 degrees Fahrenheit, it should help them dry out. I have mesh bags in the garage saved from the fall tulip and daffodil planting and I will store the batch of cloves to plant this fall in one of the bags.
Folklore and History of Garlic
Garlic has such a long history and so many myths around it that I decided just for fun to look up some of the folklore. All of the information below comes from a website called American Folklore.
Did you know that…
- The ancient Egyptians swore oaths on garlic much the same way we swear an oath on the Bible. A group in Lower Egypt actually worshiped garlic bulbs.
- Egyptian slaves were given a clove of garlic a day to eat. The belief was that it would ward off illness, which isn’t so far-fetched after all. Today, a lot of research shows that garlic lowers blood cholesterol and enhances immune system health.
- When King Tut’s tomb was excavated, archeologists found cloves of garlic scattered around the tomb.
- Garlic has always been thought to keep evil spirits away, and this belief is shared by many cultures. Koreans ate garlic before going through mountain passes to keep both tigers and evil spirits away. The Greeks placed garlic at the crossroads for Hecate, who would also keep evil spirits away. Greek midwives hung cloves of garlic in birthing chambers to keep evil spirits away from mother and child. And of course, garlic wards off vampires.
So I am safe. With that big tray of garlic on the front porch, an evil spirit dares not cross my threshold today!


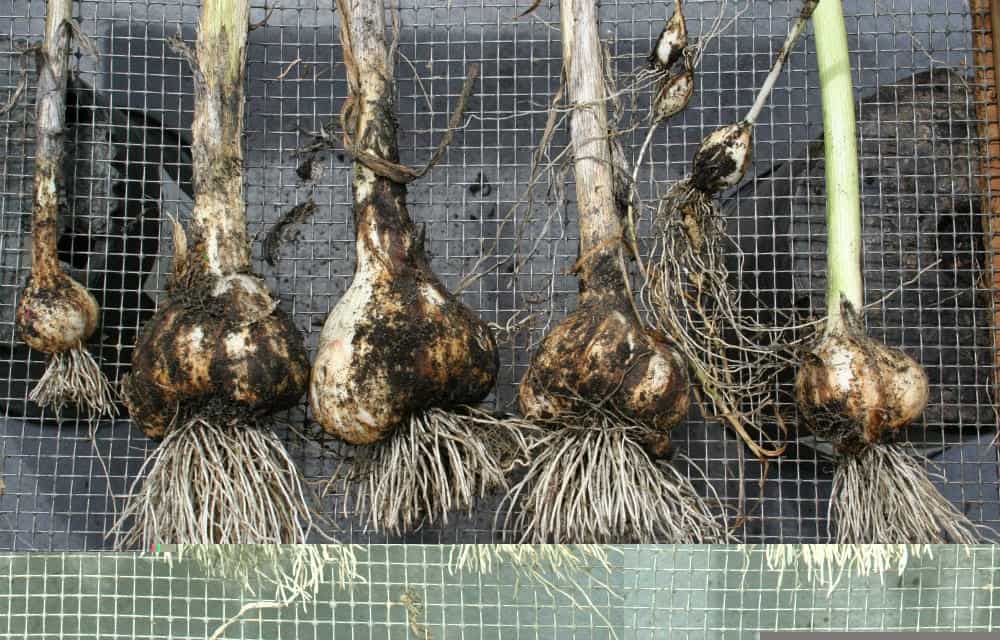
The bulbs look good! Garlic is so easy and such a return on effort!
They look great and well worth the wait. After curing, you can eat them. So how will you prepare your fresh garlic?
When someone with the sobriquet “Garlic Boss” says it looks good, I am well pleased. Thank you! And thank you Sherlock St Gardener too!
I love garlic, but my sweetie is so sensitive to the smell of it, and seems to be able to smell it on me from afar. Sighhhhh!