• Skip to primary navigation
  • Skip to main content
  • Skip to primary sidebar
  • Skip to footer
Home Garden Joy
  • Home
  • How to Garden
    • Garden Pests
    • Plant Diseases
    • Plant Profiles
    • Raised Bed Gardening
    • Seed Starting
    • Tools & Equipment
  • Vegetables
  • Fruit
  • Herbs
  • About
    • Books & Classes
      • Herbalism Classes
      • Books for Christian Herbalists
      • Privacy Policy

Gardening Skills: Layering Spring Bulbs

October 22, 2013 by Jeanne


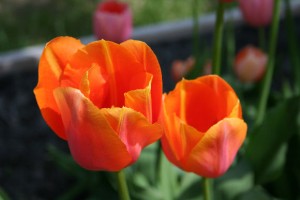
Layering spring bulbs is somewhat controversial, but this gardening technique can be used to provide continuous color for spring-blooming bulbs in a section of the garden. I’ve used layering successfully in my flower garden here at Seven Oaks to enjoy my favorite spring flowers — crocus, tulips, iris — from March through June.  With a little planning, you can do the same.
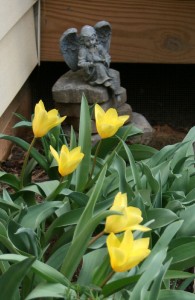
Layering bulbs means planting bulbs at different depths, depending on what they need. If you’ve ever bought a package of flower bulbs, you may have noticed the chart on the back of the package. It shows different flowers with an arrow indicating flower height and planting depth. Planting depth is important. If you plant bulbs too deeply, they’ll struggle to grow, and if you plant them too shallowly, they can freeze and thaw or get dug up by rodents.

My rule of thumb is that the bigger the bulb, the deeper the hole.  When I layer bulbs, I usually plant the daffodils and tulips on the bottom, followed by several layers of soil, to raise the depth of the hole. Then I plant smaller bulbs such as crocus, Siberian squill and late-blooming Dutch iris. (Don’t confuse Dutch iris bulbs with German bearded iris rhizomes. The two are very different plants, and are grown differently. German bearded iris rhizomes need to be planted very shallowly or else they won’t grow at all.)


Here’s how I layer spring bulbs:

  1. I start by choosing my favorite flower bulbs. For me, that always includes tulips, but it may include crocus, glory-of-the-snow, Dutch iris and daffodils.
  2. I choose complimentary colors. For example, if I have purple crocus, I look for pink, white or purple tulips and yellow daffodils to join them.
  3. I choose a spot in the garden where the bulbs can grow undisturbed for several months.
  4. I dig the hole to the deepest depth indicated by the bulbs. If I have three packages of bulbs, and Package 1 says to dig a hole 8 inches deep, Package 2 says 6 inches and Package 3 says 4 inches, I dig the hole 8 inches deep.
  5. I  layer the bulbs requiring the deepest planting depth first.
  6. Then I cover these bulbs with soil to bring the soil level up to the next level.
  7. When I place the second layer of bulbs, I try to arrange them so that they aren’t on top of the previous layer.  I’ll make patterns with the bulbs so I remember where each layer is planted.
  8. I repeat steps 6-7 for the last layer, filling in the soil, adding new bulbs.
  9. I cover the hole with a layer of mulch and mark the spot with plant markers that will last through the winter. I’m notorious for digging in the garden in the spring and pulling up my poor bulbs.
Here’s an article I wrote a while back on Choosing Spring Flowers for Continuous Color.  If you’re feeling adventurous, and you love spring flowers the way I do, try layering today.  Some argue that it’s not good gardening practice, but I’ve had good success with it.  Try it and let me know how it worked for you.

Filed Under: Uncategorized

Previous Post: « Hiking the Mount Pleasant Recreation Area
Next Post: Throwback Thursday: Trick-or-Treating »

Reader Interactions

Trackbacks

  1. How Long Do Tulips Last? - Home and Garden Joy says:
    April 21, 2015 at

    […] Gardening Skills: How to Layer Spring Bulbs […]

Primary Sidebar

Let’s Connect!

  • Facebook
  • Instagram
  • YouTube

As Seen in Porch

 As Seen in Porch

We were featured in Porch.com and answered reader's questions about indoor plants.

Explore All Gardening Articles

Latest Articles

  • Sunscald on Tomatoes: What It Is and How to Prevent It
  • Herbal Profile: Growing Calendula
  • Battling Anthracnose: A Cucumber Grower’s Guide to a Sneaky Fungal Foe

Herbalism Classes & Supplies

Goods Shop by Herbal Academy – botanically inspired products

Disclosure

Home Garden Joy participates in two affiliate programs: Amazon and The Herbal Academy. Home Garden Joy earns a commission from qualifying purchases as an Amazon Associate. As an Herbal Academy Associate, HGJ also earns a commission when you sign up for classes or purchase herbs or supplies from The Herbal Academy. Herbal information and recipes on this site are provided for educational purposes only.

Footer

a close up of a cucumber leaf with anthracnose

Battling Anthracnose: A Cucumber Grower’s Guide to a Sneaky Fungal Foe

If you’ve ever stepped into your garden and noticed strange brown spots or sunken blemishes on your cucumbers, you might be facing a common but troublesome fungal disease known as anthracnose. Caused by Colletotrichum orbiculare, anthracnose thrives in warm, humid conditions and can quickly spread across your crop if not addressed early. This year in…

Read More

cucumbers and tomatoes in harvest basket

How to Grow Cucumbers: A Complete Guide

Learn how to grow cucumbers in this complete guide. I’ve grown cucumbers my entire life, and I still marvel at the prices of them at the supermarket. I can only imagine that we’re all paying for the transportation, for cucumbers are some of the easiest vegetables to grow. In fact, you may find yourself muttering,…

Read More

small round eggplant

Growing Eggplant: A Guide for Gardeners

Growing eggplant (a small garden devoted to fresh, seasonal edibles) is relatively easy in zone 7, where I garden, but combating the bugs is another story. Growing epplant in pots, containers, raised beds, or garden soil is all possible if you are willing to go the extra mile to control its nemesis, the Colorado potato…

Read More

cherry tomatoes in various stages of ripeness

Volunteer Plants – Nature’s Unexpected Gifts

Volunteer plants are one of nature’s most delightful surprises. They spring up unbidden, often in places we didn’t expect—cracks in sidewalks, corners of compost piles, or nestled beside a stone foundation, like the vibrant coleus seedlings growing near my deck shown in these pictures. These botanical freeloaders aren’t weeds; they’re plants that have reseeded themselves…

Read More

  • Privacy Policy
  • About
  • Awards

Copyright © 2025 Home Garden Joy on the Foodie Pro Theme