
This recipe for herbal hand salve uses three ingredients: your favorite herbs, good-quality olive oil, and all-natural beeswax. Oh wait – there’s a fourth ingredient. Time. But if you’re a gardener, you are used to being patient.
Disclosure: I am an affiliate of both Amazon and Mountain Rose Herbs. This post contains affiliate links. If you buy something after clicking the link, I make money on the sale. This does not affect your price in any way. I am not compensated by either vendor for this post.
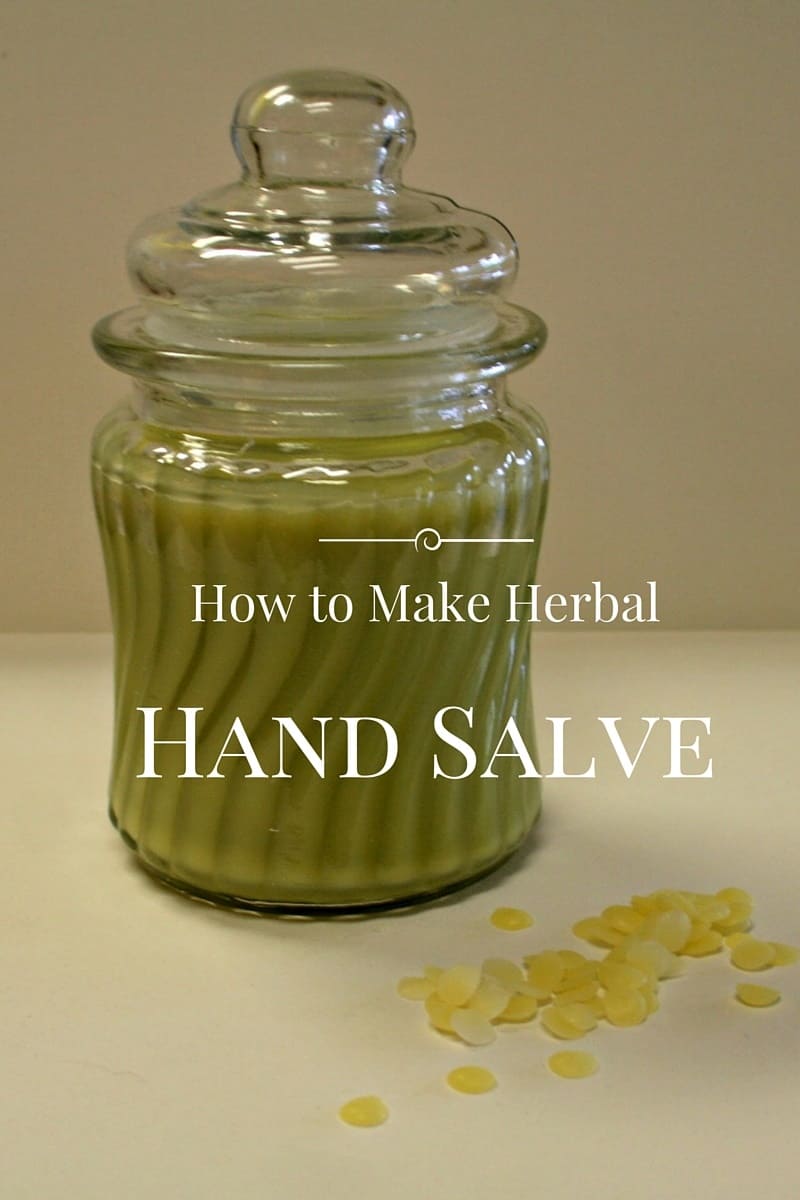
Recipe for Herbal Hand Salve
I’ve wanted to make this recipe for herbal hand salve for ages. I’ve seen countless recipes, but this one looked like the easiest. It really was very easy to make, but it took time and patience. I’m pleased with the results, and the basic salve recipe can be used as the basis for many different herbal skin and hand products.
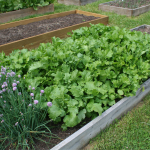
First, though, a caveat, or a word of warning: I ‘wildcrafted’ or harvested the chickweed from my yard. If you are not sure about which plants to use in the garden, please do not pick them. Just because something is a plant doesn’t mean it is always safe to use. Instead of picking plants, buy herbs from a reputable source such as Mountain Rose Herbs. They offer bulk herbs at reasonable prices and great quality.
Why Make Your Own Herbal Hand Salve?
There are many reasons to make your own herbal hand salve. Many people are concerned with the man-made chemicals found in commercial products. For those choosing to live an organic lifestyle, avoiding such products is important.
My own reasons were a little different. Since I was a teenager, I have suffered from eczema. Eczema is a mysterious skin condition. I get itchy, red skin that turns into angry blisters. The skin can get scaly and rough. The itching can be unbearable, but the scales are worse. They hurt like you wouldn’t believe!
Fortunately, my bouts with eczema have been limited to spots on my hands and feet. I have consulted with three dermatologist and four general family doctors, and each one sends me home with a prescription for a cream slightly stronger than you get at the drug store and no answers.
What triggers these attacks? No idea. Why can years go by between them? No clue. What can I do to prevent them? Nothing, the doctors tell me. The prescription creams do nothing except sting the sores. I needed something else.
I’ve tried every over the counter remedy for the rare times when it gets bad, but nothing works. I turned to this herbal hand salve as a last resort, and so far…so good.
The ingredients in the hand salve are soothing and moisturizing, which I have read helps prevent skin problems like dryness that can lead to eczema outbreaks. Washing my hands frequently after chores like weeding also means my hands dry out easily, so this cream works well as a moisturizer, too!
I have made this recipe with good results, and plan on making additional pots of salve over the summer as my herbs are ready to harvest and use.
Making the Hand Salve
The first recipe I made included chickweed, which I harvested from my yard. (Again, warning: if you don’t know what herbs look like in the wild, DO NOT pick them. Buy them from a reputable source or grow them yourself.)
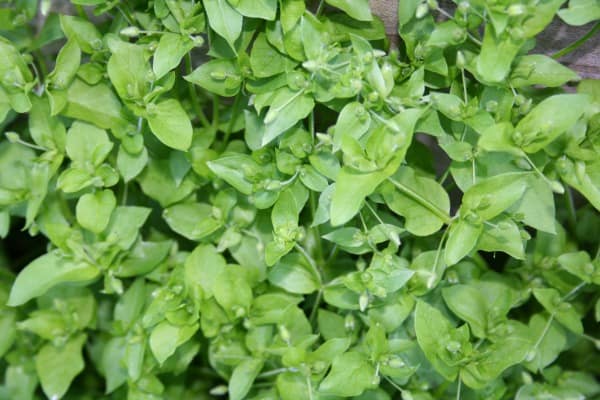
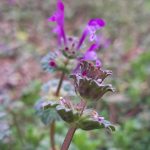
Chickweed grows abundantly in the spring.
Chickweed has a long history of herbal use. The Practical Herbalist claims it has a “cooling and drying” effect on the skin. I’ve read herbal tomes from the late 1800s and early 1900s which tout it as a skin remedy, rejuvenator and more. Web MD lists it as ‘generally safe’ unless of course you are allergic to it. It is a good idea to do a little patch test, or put a little bit of it on the skin in the crook of your elbow, and wait 48 hours to see if any reactions develop.
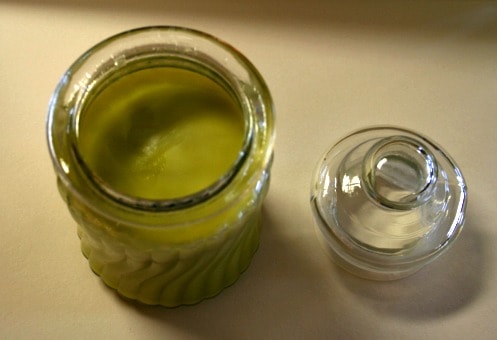
Make an Herbal Infused Oil
You can use plain olive oil or an herbal infused oil. You will need 8 ounces of oil (1 cup).
To make an herbal infused oil:
- Pack clean, fresh herbs into a glass canning jar as tightly as you can. I used chickweed. I am growing calendula to make more salve. Calendula flowers are used to make herbal skin preparations.
- Pour the best-quality olive oil you can find into the jar until it covers the herbs and there is little air room at the top.
- Screw on the lid or cover.
- Place a sticker on the jar with the date and name of the herb.
- Place it in a sunny area for two to three weeks. Every day, gently turn the jar or swirl the oil so that it continues to cover the herbs.
- At the end of the infusion time, take cheesecloth and place it over the neck of another jar or a bowl. Pour the oil and herb mixture through the cheesecloth, squeezing the last drops of oil from the cheesecloth. Discard cheesecloth and herbs. The infused oil is done.
- If the oil smells bad, do not use it. The color may change according to whatever herbs you infused. Fresh chickweed turned my oil a beautiful green color.
Now you have an herbal infused oil to use. You will use this as part of the salve base.
If you prefer to buy your herbs, this is the company I recommend:

Make the Herbal Hand Salve
You will need the following ingredients:
- 8 ounces of herbal infused oil
- 1 oz pure beeswax. I used organic beeswax pastilles purchased from Amazon.
- Pure essential oil of your choice for scent. I used lavender essential oil. A good essential oil is from Young Living. This is my friend Kathleen’s online shop for these essential oils (I am not an affiliate for them.)
Many salve recipes call for beeswax bars, which are then shaved or cut into the appropriate pieces. I prefer pastilles, which are like small round pellets. I find they are easier to measure and dissolve more quickly in recipes like this.

Yellow Beeswax Bees Wax Organic Pastilles Beards Premium Prime Grade A 100% Pure 16 oz
You will need the following equipment:
- Measuring cup
- Food scale
- Double boiler
- Clean glass jar with lid
- Spoon
Directions:
- Heat the water for the double boiler. Place a metal bowl or pan over the hot water.
- Pour one cup (8 ounces) of the infused oil into bowl over the double boiler.
- Measure your beeswax pastilles on the food scale so that you have 1 ounce of beeswax.
- Gradually and carefully add 1 ounce of beeswax pastilles into the oil.
- Stir gently with your spoon until the beeswax is dissolved.
- Remove from heat.
- Before pouring into jar, add 10 to 20 drops of essential oil to the mix to scent it. That’s optional but it gives it a nice light scent. The oil alone has a slightly olive oil smell, which isn’t bad, but the essential oils give it a pleasing fragrance. I used 10 drops of lavender oil which was a whiff of scent. It’s not overpowering.
- Pour into the glass jar.
- Allow it to cool.
- That’s it! Put the lid on the jar and use immediately. It should keep for a few months or more. If it begins to look or smell funny, discard it.
[Tweet “Instructions, recipe to make herbal infused oil and herbal hand salve. #WellnessWednesday #herbs”]
If you don’t like the consistency, here’s how to change it:
- For thicker herbal hand salve, add more beeswax pastilles.
- For more liquid salve, add more oil or less beeswax.
You can’t judge the final consistency of the herbal hand salve by the oil in the pot. To determine what the consistency will be, pour a little oil onto a metal spoon and place it in the freezer for a minute or so. It will show you the final consistency of the salve, and you can adjust it before decanting the bottles.
I had enough salve for this pretty glass jar I purchased at the dollar store, plus some additional salve which I simply poured into a Mason jar. The squat, half-pint jelly or jam jars sold to make jams are great for salve pots. Look for jars with wide openings to make it easier to scoop out and use the salve.
Please remember to use caution when making and using herbal products. If you make this recipe, you do so at your own risk, okay? Use common sense.
Thanks and I hope you enjoyed the recipe for herbal hand salve! I hope you enjoyed this herbal crafting recipe for #Wellness Wednesday #herbs
KEEP GROWING! (and learning!)

That sounds amazing!! I’ll have to look into that herb for my garden! We need the help with our hands here! 🙂 #HomeMattersParty
This looks awesome! My daughter loves homemade natural products. I think I am going to try this for her birthday! Yay! #HomeMattersParty
Hand salve comes in handy, I like that you can buy the herbs if you’re like me and don’t have any in your garden. #HomeMattersParty
I should try this – my hands are a MESS from gardening and DIY projects. Thank you for sharing! #HomeMattersParty