Did you know that you have to clean and sterilize seed starting trays, as well as pots, pruners and other gardening tools?
Table of contents
- Why Clean and Disinfect Seed Starting Equipment?
- How to Disinfect Seed Starting Equipment
- Equipment
- Disinfecting Seed Trays – Process
- Pro Tip: Always Use Sterile Seed Starting Soil
- Using Peat Pots Instead of Soil to Start Seeds
- Sterilizing Other Gardening Equipment: Garden Pruners
- How Do You Sterilize Pruning Shears or Blades?
- Preventing Plant Infections in the Garden
- More Seed Starting Resources
When I was a kid, my next door neighbor, Mr. Hoffman, would pay me a quarter to wash all of his gardening trays and pots each spring. He’d drag them all to my driveway, and I’d fill a large plastic garbage can with water. My dad would dump in the bleach, and I’d get to work, scrubbing and cleaning the pots and trays. After each pot or tray was cleaned, I’d rinse it with a blast of water from the hose. It was wet, messy work, but on a warm spring day I didn’t mind. Besides, I made a quarter – a whole quarter!
Flash forward some forty-odd years later and I know now that I was doing things half right, or half wrong depending on how you look at it. Bleach is definitely the right material to use to clean and sterilize plastic pots and seed starting trays, but there’s more to it than that.
Let’s talk first about why you need to even bother disinfecting seed starting equipment and sterilizing gardening tools in the first place. It all comes in contact with the dirt anyway, right? So who cares if it’s dirty when you use it?
Why Clean and Disinfect Seed Starting Equipment?
Healthy soil contains colonies of microbes, both the good and bad kind. The good kind breaks down plant material in the soil, creating compost, and helps plants break down nutrients in the soil. The bad kind of microbe causes plant diseases.
Prevent Damping Off Disease in Seedlings
Some diseases strike seedlings especially hard. One of these diseases is called damping off. Moist conditions and poor sanitation cause most cases of damping off. Seedlings begin to grow, then seem to wilt. Within a day or two, they topple over and die. The microbe has done its job, but killed your seedlings in the process.
How to Disinfect Seed Starting Equipment
Damping off is easily prevented through some basic sanitation practices such as disinfecting seed starting equipment. All you need is a work sink or a hose hooked up outside, a pail or basin large enough to hold your seed starting trays and containers, clean water and a bottle of bleach. I like to wear rubber gloves to protect my hands since they tend to dry out easily, especially in the winter. Have a towel handy, too.
Equipment
- Pail
- Measuring Cup
- Bleach
- Water
- Towel
- Rubber gloves
The ratio of bleach-to-water to disinfect gardening equipment is always 9 parts of water to 1 part bleach. So if you are mixing 10 cups of disinfectant solution, mix 9 cups of water and 1 cup of bleach in the pail to make your solution.
Disinfecting Seed Trays – Process
- Fill the container or pail with cold water.
- Add bleach at a ratio of 1 part bleach to 10 parts water. Some gardeners call for a ratio of 1 to 9, but I find 1 to 10 is a little easier to imagine. If you need help measuring it out, go to the dollar store and buy a one cup measuring cup that you will only use for laundry or gardening tasks. Use that to measure your bleach and water into the pail.
- Wipe off or shake off any loose dirt from the containers. Do this outside, unless of course you enjoy vacuuming and mopping your floors indoors. If that’s the case, please contact me so you can come over here and clean too…
- Soak the seed starting trays or your plastic pots in the water and bleach solution for 10 minutes.
- At the end of 10 minutes, remove them and rinse them clean in cool running water.
- Allow them to air dry, then use them for your gardening projects.
Pro Tip: Always Use Sterile Seed Starting Soil
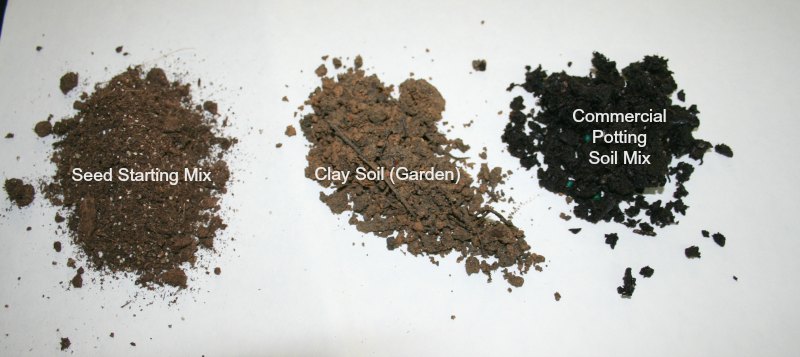
Another pro trick to prevent diseases in seedlings is to always use sterile, bagged seed starting mix from the local home and garden center rather than garden soil from your backyard. You may also use bagged potting soil, such as the kind sold to replant house plants.
Why do professionals and master gardeners choose sterile seed starting soil instead of simply digging up soil from the yard?
Soil from the yard contains bacteria, mold spores, fungi, insects, and insect eggs. In your nice warm home, with a comfy moist environment, all of those will grow and thrive…and that’s NOT what you want germinating in your seed trays. No one wants to find their plants swarming with newly hatched spiders, flies, or beetles!
Using Peat Pots Instead of Soil to Start Seeds
Another easy way to prevent disease is to use peat pots or disks. These may be purchased from your local home and garden center, plant nursery, or online stores.
To use peat pots, remove them from any plastic or netted wrappers and submerge in cool water for 10 minutes. The peat expands into a unique mini pot. Place the expanded peat pots into a tray. Each pot has a small hole or depression in the top. That is where you insert the seed.
After planting one seed in each pot, water the peat pots daily. When you are ready to transplant seedlings into the garden, slip the whole pot, peat and all, into the soil. It’s a great way of starting seeds, especially for plants who hate to have their roots disturbed, because you never have to tug or pull at the plant or its roots.
Sterilizing Other Gardening Equipment: Garden Pruners
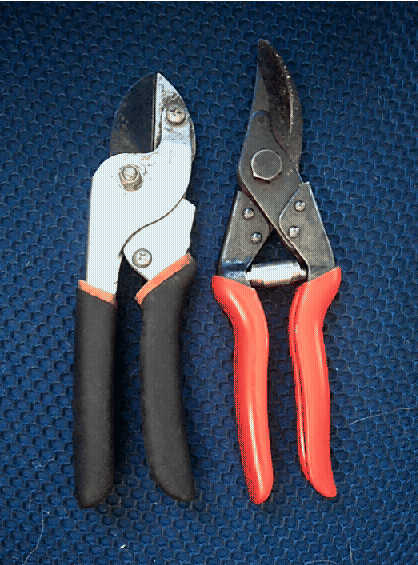
You should also sterilize gardening tools, especially pruners, before moving from one plant to another and in some cases, before cutting multiple branches on one plant.
If your plant is infected with anything, or you suspect an infection, clean the blades in between each cut. This prevents accidentally spreading the infection from one part of the plant to another.
Otherwise, simply sterilize your pruner blades before moving from one plant or tree to another.
How Do You Sterilize Pruning Shears or Blades?
You will need a bottle of rubbing alcohol, available from any pharmacy. Use an old coffee can, empty and clean plastic container or something similar. Just about half an inch of alcohol into the container and drop a clean rag into the pure rubbing alcohol.
Carry the container with you into the garden, and use the rag to wipe the blades down between cuts or between plants. Make sure you clean both sides of the blade and the cutting surface.
When you’re done using the alcohol, discard it and the rag.
Preventing Plant Infections in the Garden
You’ve heard the old saying that an ounce of prevention is worth a pound of cure. That’s certainly true in the garden. By preventing infections from spreading from the soil to your containers or from plant to plant due to dirty tools, you’re helping your plants stay healthy and infection-free. And a healthy garden is a happy garden!

Thank you for sharing your knowledge with us! I am soaking it all in & getting ready for the warmer weather to put it to use! I usually start Mother’s Day weekend so we are getting there! #HomeMattersParty