
This peach pie recipe with fresh peaches takes into account that some home-grown varieties, like Elberta, are more suitable for canning. They tend to stay hard even when ripe. The trick to make them “pie ready” is to precook them.
Peach Pie Recipe with Fresh Peaches
This recipe uses any variety of home-grown peaches but is especially good for those intended for canning, such as Elberta. Such peaches tend to have harder flesh that never feels soft when ripe. To soften them, you need to precook the filling just enough so that it is ready for the pie.
Time-Saving Trick
Another time saving trick for this recipe is to use store bought pie crust. I know – heresy! Some cooks are fainting at the thought of using a store bought crust. But honestly, when you’re fussing with a peach pie recipe with fresh peaches, you need the extra time to make the filling, not the dough.
It’s delicious either way you slice it.
Peach Pie Recipe with Fresh Peaches
Ingredients
Method
- Wash and sort fresh peaches.
- To remove the skins, you will need to blanch the peaches. Boil a large pot of water. Immerse six peaches or so of approximately the same size into the boiling water. Boil for 2 minutes.
- Remove peaches and dunk them all in a bowl of ice water. Let them stay in the ice water for 1 minute or more.
- The rapid succession of boiling water to ice water helps crack the skins. They are easier to peel. Peel each peach.
- Repeat this process until the first batch is peeled.
- Slice the peeled peaches and place them into a bowl. Make the slices approximately the same thickness. Remove any bruised or discolored spots. Add 1 tablespoon of lemon juice and toss to coat the peaches. This prevents browning.
- While you are preparing the peaches, preheat the oven to 350 degrees F. Place the bottom pie shell on a baking sheet. Once the oven is preheated, prick a hole or two in the bottom of the pie dough and bake for 10 minutes until crust is set. Remove from oven.
- Once all the peaches are peeled, place them into a heavy bottom pot like this one. Stir in a little of the sugar and heat on medium, stirring the mix, for about 15-20 minutes. Keep stirring until the peaches begin to exude their juices and soften. Add honey; cook and stir another 10 minutes. Remove from heat. Time will vary according to how hard or soft the peaches are when you start – test them with a fork. The fork should pierce the peaches but the peach shouldn’t feel mushy.
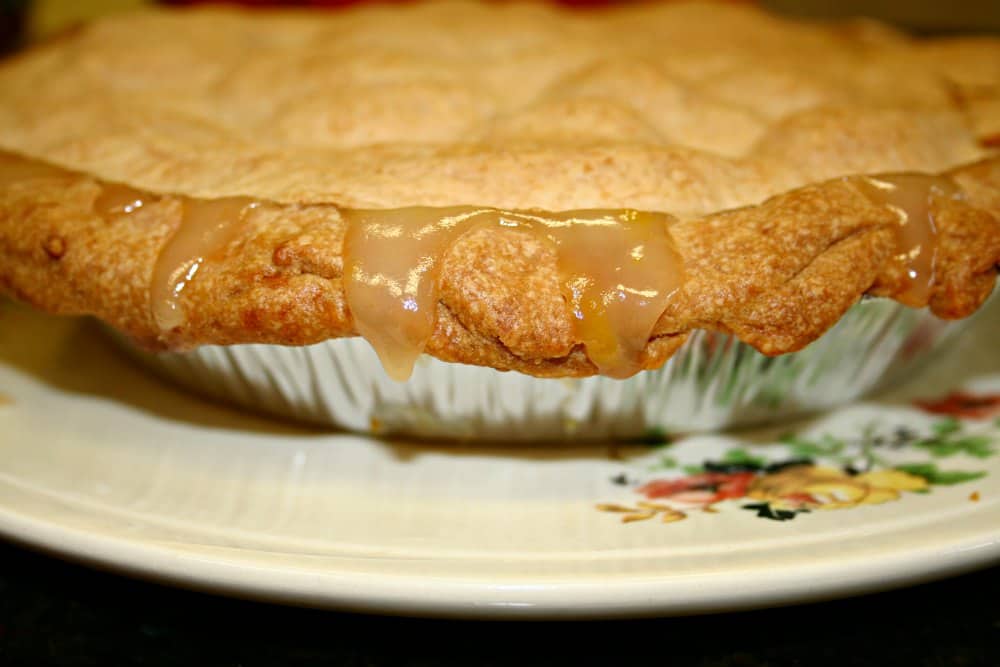
- Remove the softened peaches from the heat and turn off the heat. Stir in the remaining sugar and flour. Add mixture to the pie crust. Add top crust. Seal edges or crimp edges.
- Bake on a baking sheet at 350 for 45 minutes, then check. If the pie needs more time to get a brown even crust, add 5 minute increments checking each time to make sure the pie isn’t burning.
- My pie wasn’t sealed everywhere and the filling leaked out onto the baking tray. It burned on the tray but the pie was fine.

- Cool pie at room temperature. Serve with ice cream or Cool Whip. Store leftover pie in the refrigerator.
Notes
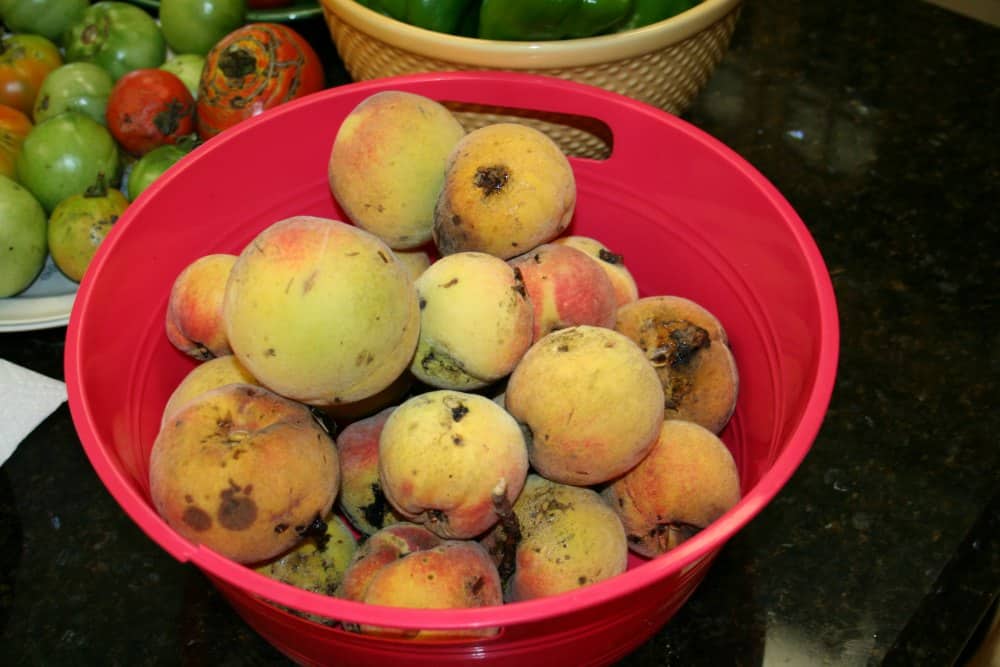 Fresh, organic garden peaches, such as this bowl of Elberta variety peaches, aren’t pretty looking. I did not use ANY pesticides or organic oils on my trees this year and the results are delicious, 100% organic, and very ugly looking peaches.
The black gooey spots are evidence of the Oriental fruit moth. Because some of the peaches are also bruised and have evidence of fruit moth, proper preparation of this peach pie recipe with fresh peaches is essential to ensure no bad spots get into the mix. Take your time on the initial stage – peeling and cutting up the peaches – to get the bad spots out.
Fresh, organic garden peaches, such as this bowl of Elberta variety peaches, aren’t pretty looking. I did not use ANY pesticides or organic oils on my trees this year and the results are delicious, 100% organic, and very ugly looking peaches.
The black gooey spots are evidence of the Oriental fruit moth. Because some of the peaches are also bruised and have evidence of fruit moth, proper preparation of this peach pie recipe with fresh peaches is essential to ensure no bad spots get into the mix. Take your time on the initial stage – peeling and cutting up the peaches – to get the bad spots out.


Came from Southern Bite and happened to have 5 large peaches in my fridge. I also have a pack of pie crust in my freezer. Walmart’s cheapest ones and the crust are so tender I am amazed. So I have a luncheon tomorrow and need to bring something and this will be my contribution. I do put butter on the top crust and sprinkle sugar on it and it gives it a nice shiny crackly glaze. I’ll be back.