
Learn how to can sweet potatoes from your garden. If you grew sweet potatoes but have little room to store them, all you need is a pressure canner, clean canning jars, and an afternoon to learn how to can sweet potatoes.
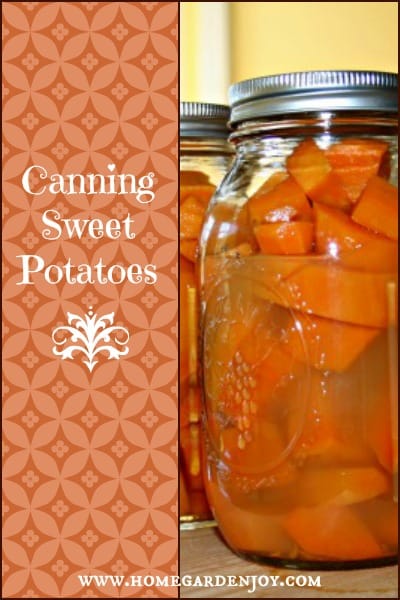
This past Sunday was my first adventure in canning sweet potatoes. I’ve canned many vegetables in the past, including white potatoes, but this was my first time canning sweet potatoes. It was fun, and they turned out great, but I made a few mistakes which I will share with you so that hopefully, you can avoid my beginner’s mistakes and can sweet potatoes like a pro!
How to Can Sweet Poatotes
Choosing Sweet Potatoes for Canning
First, use the freshest sweet potatoes that you can find. If you grew them yourself – great! Follow my instructions on how to harvest sweet potatoes.
I chose the largest sweet potatoes from my harvest. Each potato weighed several pounds; they were too large for us to enjoy as a two-person family in one meal, so I canned them. We’ll use the smaller sweet potatoes from the harvest for baking, and I can use the canned sweet potatoes to make mashed sweet potatoes or sweet potato pie.
Equipment Needed for Home Canning
You’ll need a pressure canner to properly preserve and can sweet potatoes. Pressure canners use heat, steam and pressure to kill bacteria that can cause illness and food spoilage. I have this Presto brand steam canner and love it. The instruction booklet is my little guide to canning everything!

Why do you need a pressure canner to can sweet potatoes? Home canning uses heat to kill bacteria, yeast, mold, fungi and other microorganisms that cause food to spoil and can make you sick. Depending on the acidity of the foods being canned, boiling water may be enough. Jams, jellies, and pickled foods can be canned in a boiling water bath canner. Sweet potatoes and many other vegetables, however, are not acidic enough to kill micro organisms at the boiling point of 212 degrees F. A pressure canner, which uses a combination of high pressure and steam, reaches a temperature of 240 degrees F. The pressurized canner holds that temperature for as long as the recipe requires (and as long as you follow the directions). This kills nearly all micro organisms, according to the USDA Department of Food Safety, including the botulism toxin. You don’t want to fool around with bad bugs like botulism, so don’t skip any steps. Follow the directions in the book that accompanies your steam canning equipment.
The Process for Canning Sweet Potatoes
Basic Steps for Canning Sweet Potatoes
- Choose your sweet potatoes from among those you have harvested or fresh sweet potatoes purchased at the farmer’s market or from a local farm.
- Follow the directions that came with your pressure canning equipment. Fill the canner with the appropriate amount of water. This may vary according to the equipment.
- Wash and rinse your canning jars and lids. I used quart jars, but you can also use pint jars. Use only glass jars intended for pressure canning. Make sure they do not have any cracks or chips.
- Place the lids into a small saucepan with water and heat, but do not boil them. Use new lids. Lids cannot be reused. Jars and metal sealing rings CAN be reused.
- Place the clean sealing rings in a small dish and have it ready.
- Set out a wooden board to use as a work station to protect your counters from hot jars. You will also need one or two cutting boards, a vegetable brush, a vegetable peeling, and a very sharp knife. I like to use a large chef’s metal bowl to hold the cleaned, peeled sweet potatoes and another bowl to catch the peels for the compost pile.
- Scrub and peel the sweet potatoes, then cut them into evenly sized chunks. Save the peels and add them to the compost pile.
- Place the chunks or slices in a pot of boiling water and cook for just about 5 to 8 minutes; they should be slightly tender but not mushy. They’ll cook further in the pressure canner.
- Wash your Mason jars with hot, hot water. They should be hot so that when the hot sweet potatoes are spooned into them, the temperature difference won’t cause the jars to crack.
- Boil a kettle of water.
- Ladle the sweet potatoes into clean jars, leaving at least one inch of space from the top.
- Once the jars are filled with sweet potatoes, pour the boiling water into the jars. Use a canning funnel to guide the water in and be careful not to splash yourself.
- I love the Ball Canning Utensil kit. The components are enormously helpful during canning. It contains a canning funnel, a magnetic lid lifter, special tongs to lift and place hot jars, and a gauge to assess head space and remove air bubbles from the jars. If you have this kit, use the gauge to make sure you have left whatever amount of head space is required for your canning equipment. One inch is standard. I also use the gauge to gently remove air bubbles from the jars. Slide it between the food and the glass jar inside the jar, and move the food in; bubbles will rise to the surface. You don’t need to get crazy about removing the air bubbles, but it helps.
- Gently wipe the rims of the glass jars with a dry, clean paper towel to remove any food particles that can interfere with sealing the jars.
- Use the magnetic lid lifter to place one lid on each jar. Center it.
- Close each jar with a metal screw band. Just close it finger-tight; you don’t need to use any special tools. You can tighten it again later.
- Use the canning tongs to lift each jar and place it into the canner.
- Fill the canner with only as many jars as your model specifies it can hold. Leave a little space between the jars.
- When the canner is full, place the lid onto the pressure canner according to the instructions.
- Vent the steam according to the instructions, and use the appropriate pounds for your canning equipment and jar size.

Ball Canning Utensils – my favorite!
My canning instruction book said to use 10 lbs of pressure and to can quarter jars for 90 minutes. I followed the instructions and vented the canner first for 10 minutes, placed the weight, and began timing once it achieved a steady rocking motion. When the time is up, allow your canner to depressurize by itself. Then wait 10 minutes before removing the lid, and another 10 minutes before removing the jars using a Ball jar lifter or another brand jar lifter.
Mistakes I Made
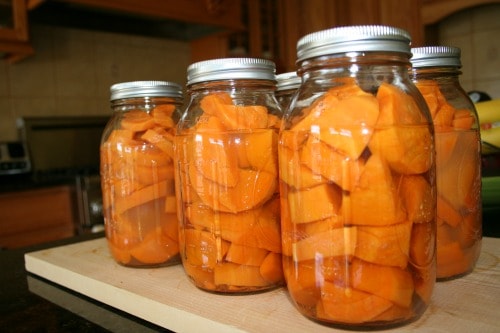
The results of my work: 6 quarters of sweet potatoes. I checked the lids and they sealed properly.
Learn how to can sweet potatoes.
Can you see how much water evaporated from the jars? It’s a lot. A little evaporation is normal. This much isn’t.
I looked up the problem online and found out that I had probably removed the jars too quickly from the canner. Once the pressure dropped from the canner, I was too hasty removing the jars. As they cooled, steam escaped until they sealed.
If this happens to your jars, you can still eat the sweet potatoes. According to the information I found online, the ones near the top may discolor slightly but they should be fine to eat IF your jars sealed properly. Label and store the jars in your pantry.
For more information on canning sweet potatoes, see the Ball Canning and Preserving website. It’s my favorite place for information, instructions and inspiration.
More Articles on Growing Sweet Potatoes and Storing Sweet Potatoes
If you enjoyed this article, you may also enjoy:
Disclosure
Please note that this post contains two affiliate links to Amazon Affiliates. If you click on the images of the canning equipment, it will take you to a page on Amazon where you can purchase them. If you make a purchase, I receive a small commission. This does not affect your price. It helps support this blog. Thank you!


Hmmm, interesting. I have never canned sweet potatoes. The most that I have ever canned were typically fruits and pickles and sauerkraut. Thank you for the tip about the water evaporating. I would like to see what kind of things you would be making with the canned sweet potatoes. 🙂
Great idea, i will have to try this I love sweet potatoes !!
Have you picked up your Liebster award ?
Mommy’s Kitchen
Thanks for leaving a comment! I’ll definitely share recipes for my sweet potato creations. I think mashed, maple glazed, and pies are in the future….!
I am a bit new to pressure canning and haven’t experimented with much beyond stock and soup. Now I want to try this.
Glad to hear it, Audrey! Don’t be surprised if some of the water evaporates from the cans near the top by the way. It doesn’t affect how the sweet potatoes taste but it does look weird. Enjoy.
This was my second and third canning of sweet potatoes. However, after cooling overnight, I found that the liquid turned whitish and became solid. The lids were sealed, potatoes had good color. The first canning turned out beautifully. I did not use sugar, did use scant 1/8 t of citric acid and 1/4 t of salt. I did not use salt in the first batch. I did remove immediately as so on as the canner had completed its cycle. What happened? Will I be able to store and use safely at a later date? Since these potatoes very freshly harvested, could this have been a problem?
Great questions, Carole. First, if you ever doubt the safety of canned food – throw it out, or, if it’s something you just canned (like a jar where the lid didn’t seal), you can put it in the refrigerator and use it immediately. My own sweet potatoes turn the liquid a sort of murky white, but it’s not solid. It might be starch. I do not use citric acid at all, and the salt that I use is preserving or canning salt. I was told somewhere along the line that regular table salt if used in the canning process can discolor the food. My own canning experiments were done with fresh sweet potatoes too. I found this document from the National Center for Home Canning that has instructions and info on canning sweet potatoes, so perhaps this may help?
Hi Jeanne, I’m featuring your post on this week’s Simple Homestead blog hop. Great job!
Thank you, Kathi – that is very kind of you! I appreciate it.