
One of my favorite fall garden tasks is saving seeds. Seed saving is really easy and a great way to save money in the garden.
Seed Saving
I learned how to save seeds as a little girl. Our next door neighbor, Mr. Hoffman, was a retired chemistry teacher from Sewanahaka High School. He had grown up near Rottkamp’s farm in Elmont (now completely paved over and very New York City-like, but when Mr. Hoffman was a boy it was a big farm).
Mr. Hoffman was like an adopted grandfather to me, and he didn’t mind me tagging along in the garden. He’d built his house in Floral Park and was one of the first on the block, so when he bought the land he bought a lot and a half – and he used the half a lot to create a mini farm. When I’d give people my address in Floral Park, they’d frown a bit and then say, “Oh, next to the farm with the corn stalks?” and they’d know exactly where I lived. (After he moved away, the new neighbors used the half a lot to build a garage and expand their house; I understood, but it was hard to see a driveway and slick new garage on that old bit of farm.)
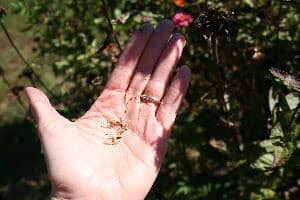
Mr. Hoffman taught me to collect pansy seeds. He had a permanent patch of pansies just outside of his back door. He taught me how to tell when the seeds were dry enough, how to pry open the pod and extract the pepper-sized seed grains.
How to Save Seeds
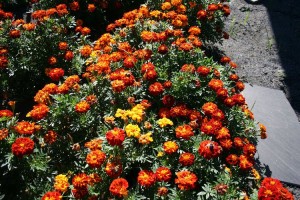
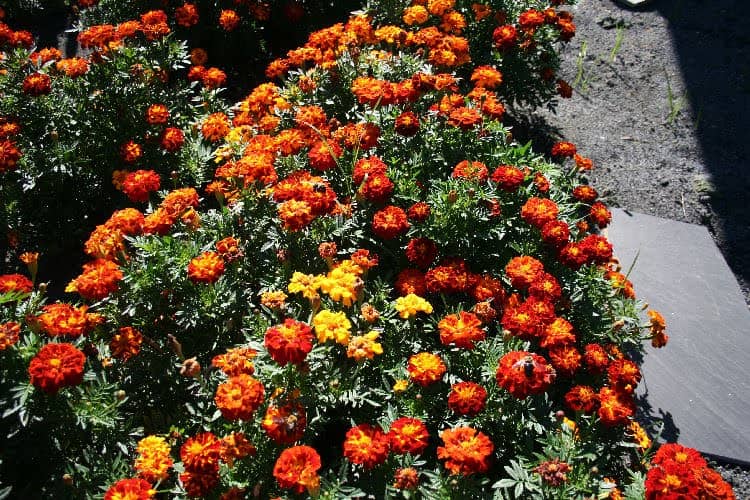
Today, I love collecting seeds. I collect buckets of marigold seeds. The marigolds in our garden now are all a mixed lot, descended from seeds my father in law planted in his garden in Huntington. Someone posted a comment on this blog asking what variety they are, and at this point I have no idea – they’ve bred and interbred, midgets and big tall ones, until we have this robust, tough as iron, orange-red type that just reseeds and thrives.
I collect zinnia seeds, sunflower seeds, morning glory, Echinacea and helopsis. I tried collecting Crepe myrtle last year, but somehow they didn’t come up, although the Crepe myrtles did reseed in the same bed and now I have a delightful little plant coming up. Seed saving ensures I always have consistency.
Before the rain comes this weekend, I’ll start collecting some seeds today.
If you’ve never collected seeds, it is easy, depending on the plant – and very satisfying to see what you collected in the fall come back in the spring. To me, it gives continuity to the garden, reminding me of the cycles of the seasons. Seed saving is a great way to save money and to ensure you get the same varieties each year.
Seed Starting Tips
I love to garden. I am also a tightwad, a cheapskate, or more nicely said, a frugal person. I hate spending money. Starting vegetables from seed gives me rich pleasure because not only do I get to garden, but I get to do so on the cheap. If I spent $1.85 on a package of sweet corn seeds, my plot yields 30 ears of corn. Even when corn is at its cheapest price in July, you can only get a handful of ears for $1. I’ve still got frozen sweet corn in my freezer, waiting for its dunk in a pot of boiling water. Nothing beats a flash frozen ear of organic sweet corn eaten in the dead of winter.
Some vegetables must be started indoors to get a head start. Tomatoes, for example, are typically started indoors from seeds about 8 to 12 weeds before the last frost date in your area. Here in my tiny town in Virginia, that date can vary a bit because we stand in the shadow of the Blue Ridge Mountains, and the weather patterns can vary a bit from year to year. But generally speaking, I plan to set my vegetable plants outside in the garden around May 1, give or take. And that means now’s the time to start seeds.
Indoor Lights
I love to grow seeds indoors, but in order to grow all the flower and vegetable varieties I crave, I need indoor lights. I started shopping among the many gardening catalogs and was appalled at the prices. Three hundred, four hundred, five hundred or more dollars for a multiple shelf indoor light fixture! Just because something is meant for gardeners doesn’t mean you need to slap a high price tag on it.
Scanning the pictures one day and realizing that my tightwad little heart would never justify the expense for an indoor light fixture, I asked my long-suffering husband if he could rig something up for me. He said, “Sure” so off we went to Lowe’s for lumber and fluorescent light fixtures. But before we made it to the lumber aisle, he spotted the home shelving aisle. “This is it!” he cried.
And it sure was. Because for about $150, I now have a wonderful five tiered lighting system that can grow up to 10 flats of seeds! Better than seed starting kits, grow lights, fancy indoor lighting systems, here’s how this gal creates seed starting on the cheap with her homemade light fixture.
Make Your Own Seed Starting Lights
Here’s how we made our own seed starting system.
We purchased:
- A five-tier utility shelf. This is a plastic shelving system that clips together. The shelves have holes in them, which made it easier to hang the lights. In January, Lowe’s often runs sales on “home organization” items, and this shelf was on sale for approximately $39. It took us one hour to assemble.
- Fluorescent light fixtures. We purchased four, which hang underneath each shelf. Each comes with a chain. Using the chain, you simply run the ends of the chain up and under the perforated shelves, through the holes, and connect the chain with a clip. Voila! Lights are hung up!
- Light bulbs: a box of 12 gave us enough for all of the fixtures (2 in each) plus some extras.
- Timer: I keep my seed starting lights on a timer so I don’t have to remember to go down to the basement every day to turn the lights on and off.
- Extension cord: I use a power strip that we had around the house so we can plug multiple lights into it.
Total cost? About $150.00. Assembly time? About two hours, give or take.
Now if I had purchased that fancy light starting system in the catalog, it would have cost me $399 plus oversized shipping and assembly time….so we got just as much space to start our vegetable seeds, yet paid less than half.
That’s enough to warm this cheapskate gardener’s heart!
Other Money Saving Gardening Ideas
Because I’m always looking to save a buck, here’s a compilation of my other money-saving seed starting ideas. See which ones appeal to you so you can save money on your gardening this winter and spring!
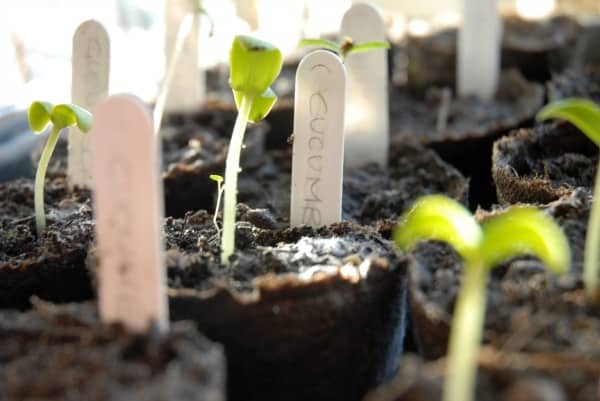
- Seed starting trays: If you save the plastic trays from the garden center in which you buy annual flowers in the spring, you can wash them with water and a mild bleach solution (to kill any microbes), rinse, and fill with soil. Instant seed starting trays.
- Instead of the clear plastic domes that come with trays, use a clear plastic produce bag, loosely fitted around the seed starting tray, to mimic the greenhouse kits.
- Plant labels: You’ve probably made plant sticks or labels from popsicle sticks, but how about from cake frosting cans? Take a frosting can and use that yummy frosting. Then wash the can with soap and water and get any frosting residue out. Use the water to rinse off the label. Now with sharp scissors, very carefully cut into the can, making a cut from the open end to the circular bottom. Do this at quarter inch intervals all around the can, then cut the sticks away from the bottom. Use a permanent marker and you have instant plant labels!
- Seeds: I buy seeds from the dollar store. Each spring they have a variety for 4 for $1 or sometimes even 10 for $1. I get many flower seeds this way. I save marigold and zinnia seeds. I even trade seeds with my neighbors!
If growing flower gardens and vegetables are your passion but money is tight, I hope these tips helps. Last year, I coaxed 30 ears of corn, 20 pounds of carrots, 20 pounds of beets, and approximately 20 pounds of turnips and onions out of my garden, along with pounds and pounds of peppers, tomatoes, watermelon, cantaloupe and strawberries. To buy this much organic produce at the market would cost a fortune, but thanks to a few packets of seeds, I was able to feed my family well for many months. You can, too!
Seed saving as well as these inexpensive seed starting ideas, can help you grow a great garden without spending a fortune.


[…] item you will need is seeds. Volunteers, perhaps starting with Master Gardeners and garden clubs, save their seeds, label them, and place them in the […]