Do you remember a few years ago when I first tried my hand at canning? My first attempt at canning was in October of 2009. Since then, while I wouldn’t call myself a pro, I’ve gotten comfortable enough with the process that I’m able to accomplish twice as much in half the time. Today I decided to photograph the process for canning beets.
A friend asked me if canning them meant I was storing them in glass jars or metal cans. It’s funny but I never thought of that before – when someone talks about home “canning” beets or any other food, they’re actually talking about the process of sealing the food in glass jars. I’ve read that trying to can foods in metal cans at home is impossible because of the high temperatures you’d need to sufficiently sterilize the inside of the metal cans, plus sealing them requires a high temperature. Since sometime in the late 1800s, processing foods using a steam bath or pressure canning system has helped people preserve the summer harvest to enjoy all year long.
Learning how to preserve or “put up” food didn’t take long, and I consider myself a total klutz at all things domestic. I inherited an old grannyware canning pot from my husband’s family; we think it was his great-grandmothers, and it’s starting to show its age in rust spots. Nevertheless, it works, and I’ve put it to good use since my first attempts at canning results in nicely preserved jars of pears and pear butter. Two Christmases ago my husband bought a pressure canner for me, and last summer we canned an amazing amount of green beans, potatoes and peppers, all of which taste wonderful. I use them every week and made mashed potatoes this Sunday night from a jar of potatoes I sealed last August!
Today I worked on canning the first of the beet harvest. I grow organic beets. The variety I grow is a classic one called Detroit Dark Red. I plant the seeds in early spring and by late June, we have baseball-sized beets that are perfect to harvest and can. We went out into the garden early this morning before the heat became oppressive and pulled only those beets we could see were large enough. A few smaller ones came up too, but we included those beets in the mix. Once they’re pulled from the ground, they tend not to root again. I haven’t had good luck replanting them.
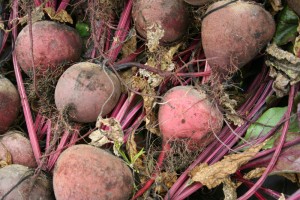 |
| Organic beets, waiting to be cleaned. |
I use a pail in the garden so that the dirt clinging to the beets falls to the bottom of the pail. I wash the beets outside to get the soil clinging to their skin off, and I use a pair of kitchen shears to cut off the stems and the roots. Don’t cut too close to the beet, however. If you cut the skin at this point, the color and most of the flavor will leach out into the cooking water and you’ll have tasteless beets.
After the beets are washed and the stems are added to the compost pile, they get a second wash in the kitchen sink. I use two pots to cook all of the beets. Beets should be peeled after they’re cooked. Again, if you peel them before they’re cooked, you get pretty-colored cooking water and tasteless beets.
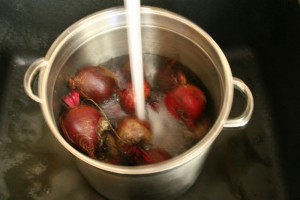 |
| Filling the pot with water and beets to cook them. |
Make sure that when you add beets to the pot, the water covers them. I usually fill my cooking pots so that they are half water, half beets. I then boil them on simmer for 45 minutes. At the end of the time period, they get dumped into a colander in the sink to cool a bit. Then the REALLY messy part begins – peeling them. The skin slips off with a knife, but wear an apron and be prepared for a mess. I cut off the stem and root portion to create a flat surface so the beets don’t roll. Then I just rub a sharp knife down the side to peel the skin away. The newly peeled beet is sliced into coins.
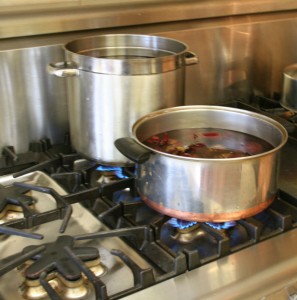 |
| And they’re cooking…two pots for nine pints of finished beets. |
The recipe that I use created pickled beets, and it is available in the Ball Big Book of Home Canning. The ingredients for the pickling sauce are simple: pickling spices, water, vinegar and sugar. The beets must be cooked with the sauce, and then packed into hot jars with sauce and processed in a hot water bath canner for about half an hour.
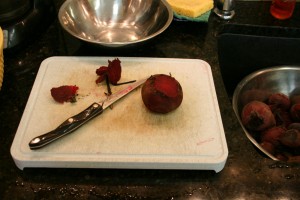 |
| Scraping the skin off after cooking preserves the color and flavor. |
The resulting beets are very versatile. You can just drain the liquid off, add sliced onion and Italian dressing, and you have an instant salad. You can also pour the whole thing into a saucepan, add 1 tablespoon of butter and one teaspoon of corn starch and you have instant Harvard beets. It’s that simple!
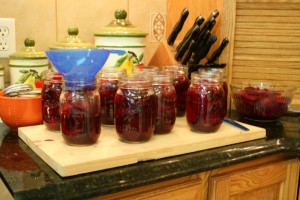 |
| Final steps – filling the jars before cleaning the rims, sealing and processing. |
The first crop of beets takes about 2 to 3 months from planting seeds until harvest. I don’t do anything special with them other than water them. So what if insects chew the leaves? A few holes won’t harm the beets. I don’t fertilize them, but I do add plenty of compost to the soil each spring before planting.
I still can’t describe the feeling I get when I look at my pantry shelves filled with jars of home preserved food. I know exactly where that food comes from, starting with the seeds and ending with how it is processed. It tastes delicious, and at at least $1 – $1.50 per jar of beets at the store, I’ve saved quite a lot of money today by home preserving beets.
For more information on how to preserve foods, visit the National Center for Home Preserving.



[…] Home Canning Beets […]