Have you seen an amaryllis bulb kit in the store and wondered if it would actually grow?
The small boxed kits contain everything you need to grow a beautiful amaryllis flower. And, once you plant an amaryllis bulb kit, the plant will produce MORE plants year after year. I’ve given several away and they still produce more. Here’s all you need to know about these popular flowers and the kits.
How to Grow an Amaryllis Bulb Kit
Amaryllis flower bulbs appear in garden centers and big box retail stores in the fall, and are often packaged as Holiday gifts. With their large trumpet-shaped flower in blazing colors of red, salmon, pink and white, as well as striped flowers, amaryllis make cheerful additions to the holiday home. Just when you think you can’t take another gray day of winter, your indoor amaryllis flowering house plant bursts into blossom. The blooms last several weeks, and amaryllis flowers can be encouraged to repeat the show and bloom again with careful tending. If you’ve ever wanted to grow an amaryllis bulb or you’ve seen amaryllis bulb kits and wondered how easy or tough they are to grow, here’s how to grow an amaryllis bulb or amaryllis bulb kit.
Please note: Home Garden Joy participates in the Amazon Affiliates program. This blog post contains affiliate links. When you purchase a product through these links, we receive a small commission. It does not affect your price at all. Thank you for supporting Home Garden Joy!


Where Are Amaryllis From?
Like many holiday plants, amaryllis hails from South America. They grow from a large bulb similar in appearance to a tulip bulb. Amaryllis need approximately 7 to 10 weeks from the time you plant the bulb to the time they flower.
The bulbs remain dormant when temperatures drop into the 40s (Fahrenheit), so most bulbs are shipped in cool containers and are stored in cool storage units. If you purchase amaryllis bulbs and cannot plant them right away, or you want to time the blooms so that they bloom for Valentine’s Day instead of Christmas or New Year’s Day, you can keep them in the refrigerator to continue the chilling period. However, never store amaryllis in a refrigerator with apples. Apples can actually sterilize the bulbs and prevent them from growing.
How to Plant and Grow Your Amaryllis Bulb Kit
When you’re ready to grow your amaryllis bulb or open your amaryllis bulb kit, you will need:
- One amaryllis bulb. Look for large, solid bulbs. Like tulip bulbs, the larger the bulb, the larger the flower, so if you can choose from among the bulbs at the store, try to pick a large bulb.
- Good quality houseplant soil. Bagged, all purpose houseplant soil is fine. Do not use soil dug up from the garden. Insects may hatch from it, or you may accidentally bring plant pathogens indoors. Always use sterile potting soil for houseplants.
- A pot with good drainage holes in it.
- A plant stake or a dowel.
How to Plant the Bulb
Place the soil in the pot, and hold the amaryllis bulb in the pot. The soil should come up to the neck of the bulb or approximately where the narrow portion joins the bulbous bottom. Do not place soil around the thinner neck. Amaryllis bulbs should be planted with the pointy-side (neck) facing up. Do not trim the bulb at all. Tiny thread-like things hanging off from the bottom are roots. These should be left alone.
Once you have placed soil in the pot, set the pot in a warm, sunny spot. Amaryllis bulbs need warm temperatures to break dormancy. When they receive this, they flourish when the house is about 70 degrees and need full, direct sunshine. A bright south or southeast facing windowsill is ideal.
Water your amaryllis bulb sparingly for the first few weeks or until you see the green stem and a set of leaves appear. After the first leaves appear, you can increase the watering, but be sure you don’t soak the pot.
As the amaryllis grows, if the stem appears weak or floppy, use the plant stake in the pot and a green bread tie or twist-tie to tie the stem to the stake. Sometimes the stem is fine until the heavy flowers appear, at which point you may need to add the stake.
Caring for the Plant
After the flowers appear, keep your amaryllis well-watered. When the flowers die back, you can trim the flower stalk down and leave the plant in the sunlight to encourage another blooming. You may be able to coax two blooming periods per year from one bulb. After the second bloom, trim the flower stalk away and let the plant grow as a houseplant in a sunny location.
You can safely store your amaryllis bulb and repot it in the fall. Cut back on the watering, and in the late summer, trim the leaves and stems back to only about 1-2 inches. Then remove the bulb from the pot, gently brush the dirt off with your hand or a dry paper towel, and place the bulb in a cool 40-45 degree location. It can be stored until you’re ready to plant it and start the cycle all over again.
Give Them As Gifts
Amaryllis make great holiday plants, and their showy flowers quickly become the focal point of the room. Even if you kill plastic plants, you can enjoy amaryllis bulb kits. They’re inexpensive and provide you with a beautiful flowering houseplant during the dull winter months.
Step-by Step Instructions
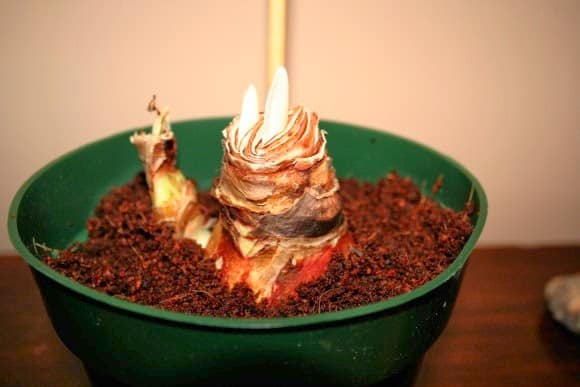 |
| My amaryllis, Week 1. |
Some people mark the approach of Christmas with an Advent Calendar, or perhaps a shopping spree. Not me. Yesterday as I did my grocery shopping, I spied the ubiquitous tower of amaryllis bulb kits. At only $5 each, they’re a bargain. Each kit contains a pot, soil, and the amaryllis bulb, along with fairly clear instructions on how to plant your bulb. I bought Amaryllis “Apple Blossom” because I love apple blossoms. It’s a light pink and white striped flower.
I’ve decided to mark the approach of Christmas by photographing my amaryllis kit and documenting its growth right here on the blog. Each Sunday, I’ll take new photos of the plant, and each Monday until Christmas (or whenever it blooms!), I will share with you its progress.
It now has a place of honor on the warm, sunny and bright bookcase in my office, but if the light proves too strong for it, I will move it to the top of the filing cabinet.
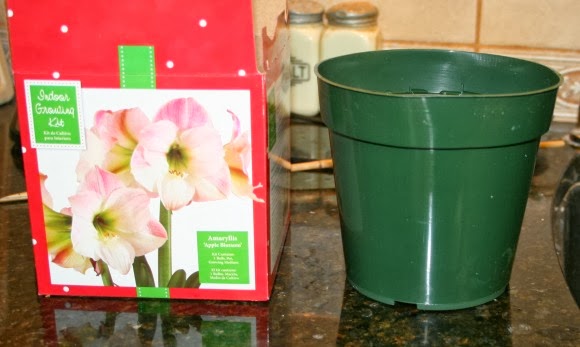 |
| STEP 1: Buy a kit. This is the $5 kit from Wal-Mart. It contains the amaryllis bulb, the pot, and a coir disk. Coir is the husk of the coconut. It is dried and pressed into a disk and is used for a growing medium. |
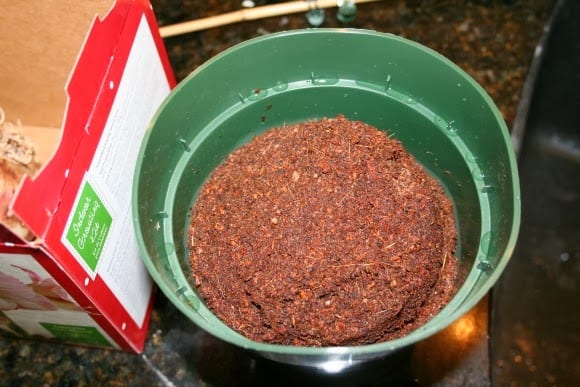 |
| STEP 2: I followed the directions on the box. The coir disk is unwrapped and placed in the bottom of the pot. I added 3 1/2 cups of very warm, almost hot water. It expands the coir so that it fills the pot. I stirred it up to make it into soil. |
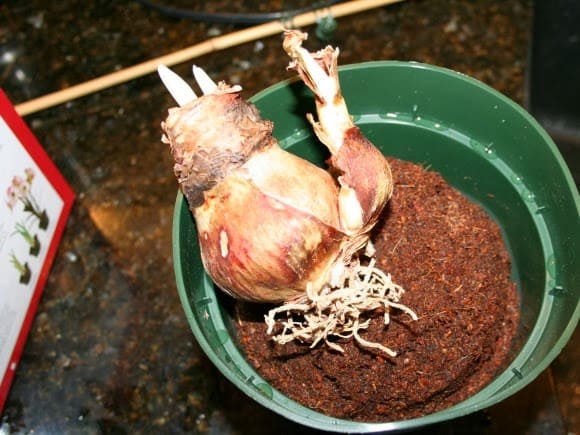 |
| STEP 3: Plant the amaryllis bulb. Plant it pointy-side up. The roots, shown above, go in the soil. Don’t plant it too deeply. Look at the illustration on the package. |